Microsoft Dynamics 365 CRM Configuration
When Symbee Connect is integrated with Dynamics 365, the Symbee Connect Dynamics 365 Fusion provides the following functionality:
- Allows the Symbee Connect Agent UI to be embedded within the Dynamics 365 UI (using Openframe).
- Perform automated screen pops for incoming interactions.
- Perform automated screen pops for outgoing interactions.
- Supports click-to-call.
Prerequisites
Prior to following these steps, this guide assumes the following pre-requisites have already been completed:
- Your Amazon Connect instance has already been set up with the appropriate phone numbers, contact flows, routing profiles and call queues.
- Your Symbee Connect instance has been set up and configured with your Amazon Connect instance details.
- You have an Dynamics 365 Environment configured.
Embedding Symbee Connect within Dynamics 365 per this guide, is only supported in an environment where SAML Single Sign-on (SSO) is enabled. This is due to Dynamics 365 blocking the login window popped by Symbee Connect when SSO is not enabled.**
Whitelisting Dynamics 365 Domain in Amazon Connect
Before you can embed the Symbee Connect within Dynamics 365, you will need to add your Dynamics 365 domain to the whitelist of trusted domains in your Amazon Connect Instance.
An example URL:
https://< dynamicsinstancename >.crm.dynamics.com
Please refer to the reference guide on how to Whitelist a URL in Amazon Connect.
Configuration Settings for Dynamics 365
Install and Configure Dynamics 365 Channel Integration Framework
- Login to your Dynamics 365 instance as Administrator.
- Click on Environments from the left side menu bar.
- Select the Environment you want to configure from the list of available environments.
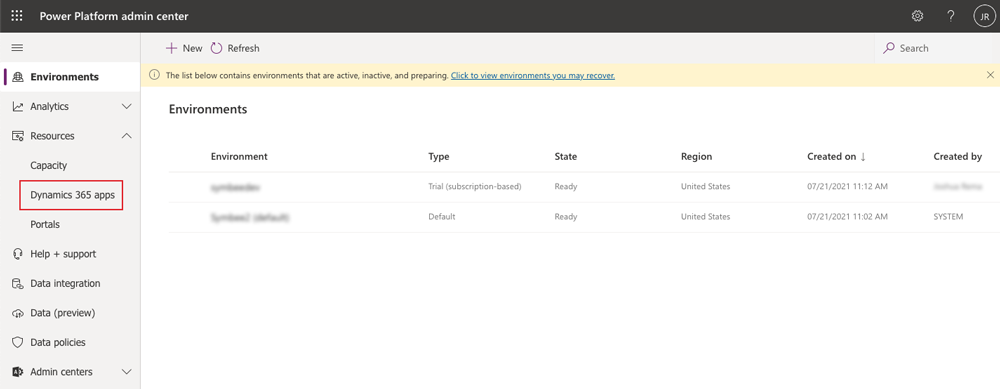
- Expand Resources on the left side menu and click on Dynamics 365 apps and then select Dynamics 365 Channel Integration Framework.
- Note: If Dynamics 365 Channel Integration Framework is not listed as an option, you may need to download and install it. An example link is below, but this may change. Search in Google on: "Get Dynamics 365 Channel Integration Framework 2.0 Download" and look for the Download option.
- Click on the Install button on the top bar.
- A dialog box will be displayed:
- Select the environment you want to configure.
- Agree to the terms.
- Click Install.
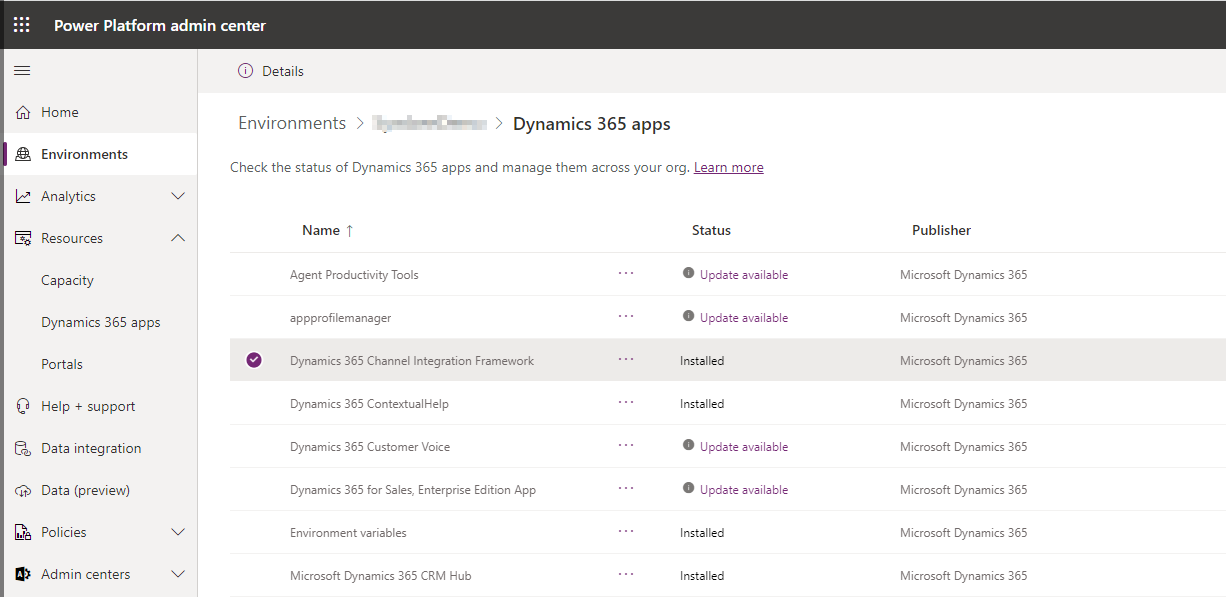
- Validate the installation has been successful by:
- Go to Environments and select your environment.
- Click on Dynamics 365 apps (under Resources on the bottom right of the screen).
- Scroll down to Dynamics 365 Channel Integration Framework and it should have a status of Installed..
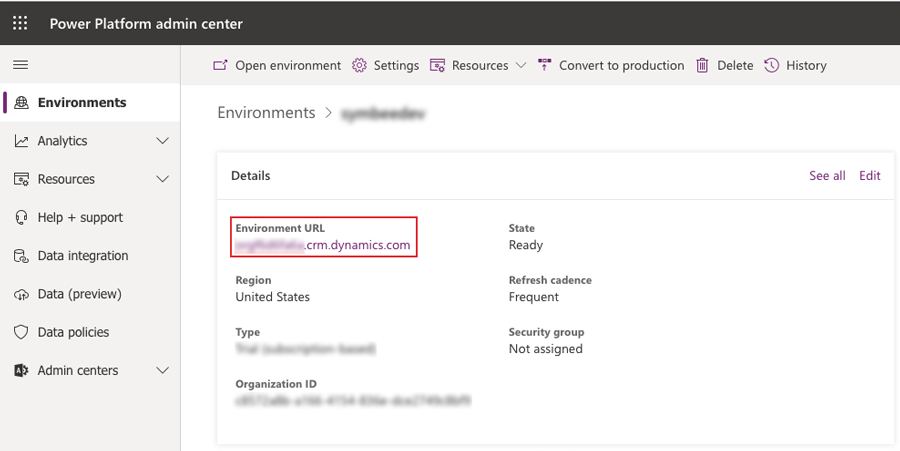
- Click on Environments from the left side menu bar.
- Select the Environment again.
- Click on the Environment URL under the Details section..
- Click on Channel Integration Framework.
- Once the page is displayed, click on the Settings cog icon on the top navigation bar and select Advanced Settings.
- Click on the heading next to the Dynamics 365 logo (it will be the last thing you had selected).
- Select Channel Integration Framework.
- From the top midde middle navigation bar select New and configure with the following settings:
- Name: Symbee Connect
- Description: Symbee Connect
- Channel: Symbee Connect Agent URL copied from front page of Symbee Connect Administration Portal.
- Enable Outbound: Yes
- Channel Order: 0
- Select Unified Interface Apps for the Channel: Select all
- Select the Roles for the Channel: Select all.
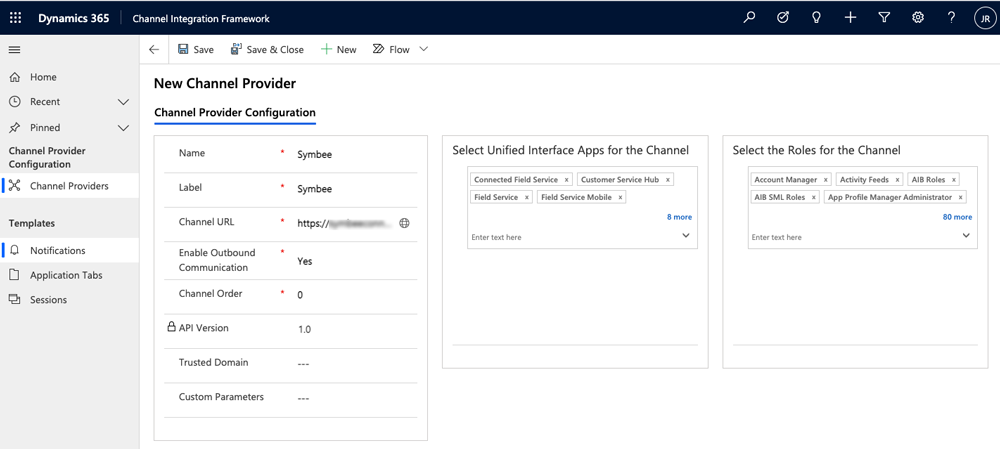
- Click Save & Close.
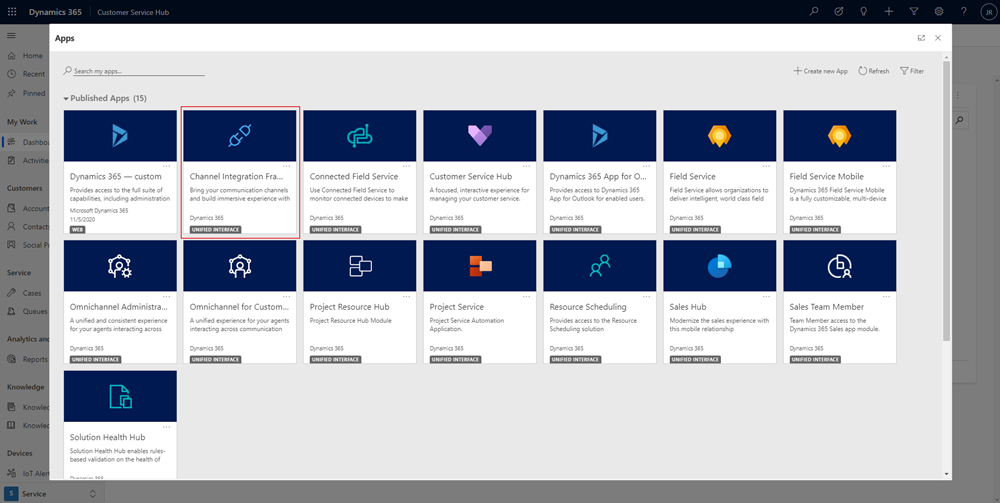
Verify Symbee Connect is now embedded in your 365 App Experience view
- From the Dynamics 365 portal, go to one of your Unified Interface App experiences by clicking the heading next to the right of the Dynamics 365 logo on the top navigation bar.
- Select one of the the Unified Interface Apps.
- Once the App view loads, confirm on the right side of the screen, the Symbee Connect app appears.
- Sign In to Symbee Connect.
Add Registered App in Azure
The following steps are used for API Access:
- Login to Azure Active Directory Administration Center.
- Select Azure Active Directory from the left side navigation bar.
- Click on + Add, select App registration and configure with the following settings:
- Name: Symbee Connect
- Supported account types: select the first option - single tenant.
- Redirect URI (optional): use the default.
- Click Register.
- An Application screen will be presented for Symbee Connect using the information you have just entered.
- Select API Permissions from the left side menu:
- Click on + Add a permission from the middle navigation bar.
- Select Dynamics CRM and click on User Impersonate.
- Click on Add Permission.
- Select Certificates & secrets from the left side menu:
- Select + New client secret located in the lower part of the screen.
- Description: add a desciptive name.
- Expires: select 24 months (the maximum)
- Click Add to save.
- Copy the contents of the *** Secret Value and Secret ID*** fields as you will need them later. Here is an example of the fields:.

- Select Enterprise applications from the far left side menu.
- Scroll down to the Symbee Connect application and copy the Application ID as you will also need this in the next step.
Lastly, while still in the Azure console, you will also need your Azure Tenant ID when configuring the Dynamics 365 Integration within the Symbee Connect Admin portal in the following steps.
- Click on Azure Active Directory in the left hand navigation bar, and Overview (the top option on the resulting nav bar)
- Copy your Tenant ID value from under the Basic Information section, and save it for use further below.
Setup New User (used for API Integration from Symbee Connect)
-
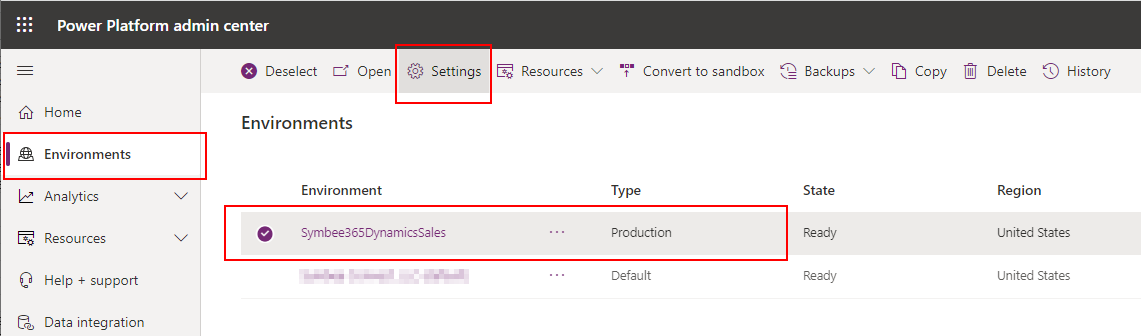
From the Power Platform Admin Center portal, go to Environments, select your Dynamics environment, and click Settings in the top bar
-
Then from Environment Settings, expand the User + permissions section, and select Application Users…

-
Select + New app user

-
In the slide-out Create a new app user on the right, select Add an app
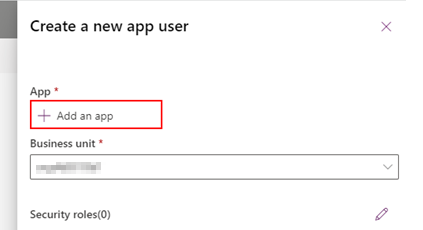
-
In the resulting list of Apps, select the Enterprise App you created in the previous section above that represents your Dynamics environment, then after selecting it, back at the Create new app user slide-out above, click Create (at the bottom)
-
Back under your Environment Settings you should now see the App added as an Application User for your environment
-
Select the new Application User entry found above, and with it selected, there will be an Edit Security Roles button in the top nav bar
- Check and select the Roles you want to assign, and select Save at the bottom (using System Administrator is one option/approach)
Enable Click to Dial
- From the Dynamics 365 portal, click on the Settings cog icon on the top navigation bar and select Advanced Settings
- Click on the arrow next to the Settings heading on the top navigation bar next to the Dynamics logo.
- Select Customizations
- Click Customize the System
- Expand Entities
- Expand Contact
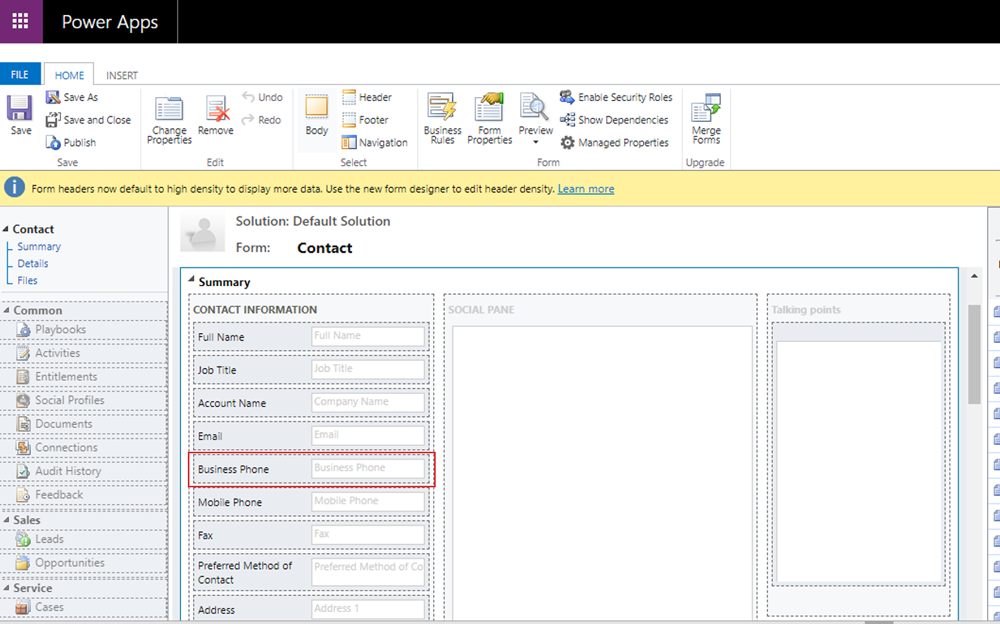
- Click on Forms and choose Contact:
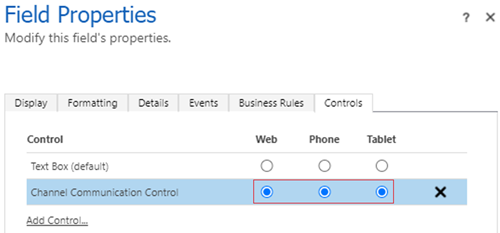
- Double click on one of the phone fields and click on Controls tab.
- Click on Add Control.
- Select Channel Communication Control
- Click Add
- Select the Web, Phone and Table radio buttons for Channel Communication Control.
- Click OK, then Save and the Publish.
Note: This will need to be completed for every form and phone control you want to enable Click to Dial for.
Enable Dynamics 365 Fusion in Symbee Connect
The last steps are to configure your Symbee Connect Company and User Profiles for use with the Dynamics 365 CRM.
These steps include:
- Creating a User Profile Template for your Dynamics 365 users – makes it easier to provision new Dynamics 365 users in Symbee Connect.
- Applying the new Dynamics 365 Symbee Connect User profile to your first User/Agent.
Create User Profile Template for Dynamics 365 Users
- Login to the Symbee Connect Administration Portal.
- If you have more than one Environment configured within your Company in Symbee Connect, make sure you have the appropriate one selected. This can be found on the Navigation bar to the left of the Function menu.
- Click on the Function menu on the in the top navigation bar and then select User Administration located under the User Configuration section.
- Select User Templates on the left navigation bar and from the User Templates list view, click Add Template.
- In the New User Profile Template dialog box, enter the following:
- Template Identifier: Dynamics 365 Users
- User Profile Template Name: Dynamics 365 Users Template
- Once the new template has been created, it will appear in the User Templates listing screen, select and click on the Modify button.
- Make sure you have the User Mode set to Engagement, this is in the center of the screen.
- Select AWS Integration from the let menu, then choose Amazon Connect Integration. Make sure there is a tick in checkbox next to ACD Amazon Connect Integration.
- Now select CRM Integrations from the left menu and then select Dynamics 365 Fusion.
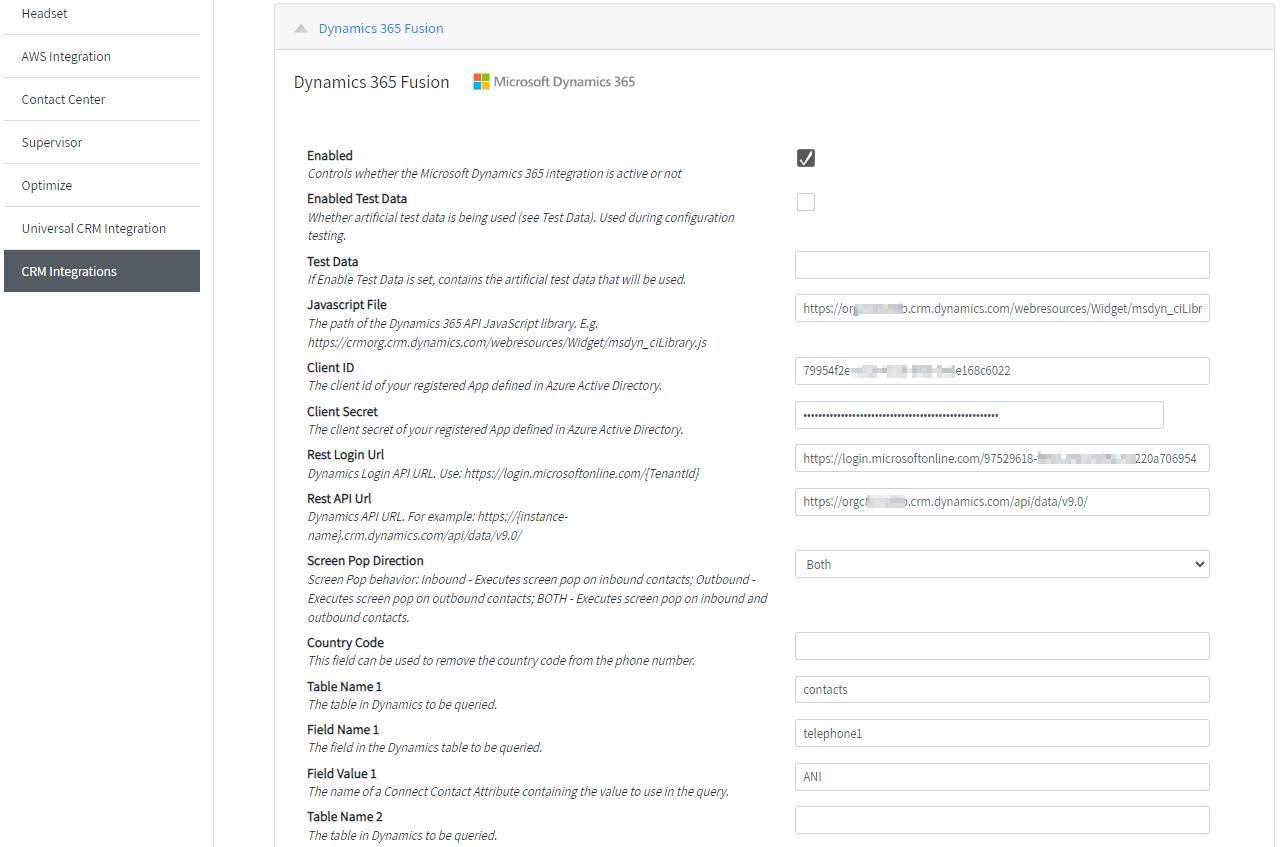
- Make the following changes in the Dynamics 365 Fusion settings:
- Enabled: Checkbox ticked.
- Javascript File: The path of the Dynamics 365 API JavaScript library. E.g. https://crmorg.crm.dynamics.com/webresources/Widget/msdyn_ciLibrary.js
- Client ID: This is the Application ID of your Azure Enterprise App representing your Dynamics 365 environment you noted in the above step.
- Client Secret: This is the contents of the Secret Value field obtained in above step
- Rest Login Url: Dynamics Login API URL. Use: https://login.microsoftonline.com/{MS Azure TenantId} using your Azure Tenant ID noted in the above step.
- Rest API Url: Dynamics API URL. For example: https://{instance-name}.crm.dynamics.com/api/data/v9.0/
- Screen Pop Direction: Select whether you want Inbound, Outbound or Both.
- Country Code: This field can be used to remove the country code from the phone number.
- Table and Field Names: Configure the Table and Field Names to specify the entities (for example: user, record, incident, ticket, etc) to pop in a screen pop, which field in the entity to match and the value to be matched with.
- Scroll back to the top and Save.
See an example below of the completed section:
Apply Dynamics 365 Template to Users
- From the Symbee Connect Administration Portal, choose Function and then User Administration located under the User Configuration section.
- Select User Profiles from the left navigation bar.
- Check all the users you would like to apply the new Dynamics 365 template to and click Apply Profile button.
- Select the Dynamics 365 template from the dropdown menu and then click on the Apply Template button.