Creating Custom Reports
Overview
Symbee Connect Business Intelligence (SCBI) collects, organizes, and compresses all of your AWS Contact Center and Symbee Connect related data, making it available for use with Amazon Athena, and deploys a base set of resources into Amazon QuickSight for visualization.
Predefined reports (called Dashboards in QuickSight) are then available for deployment into QuickSight through the Symbee Connect Administration Portal for common use-cases - think of these as the standard, or managed reports. All predefined/managed report-related resources (Dashboards and DataSets) are deployed into your QuickSight account under an scbi-managed... Shared Folder, and have their ownership set up to be owned by any users that belong to the scbi-admins QuickSight User Group.
Do not place any of your custom dashboards or analysis's into the scbi-managed... Shared Folder tree in QuickSight
The contents of the scbi-managed... Shared Folder in your QuickSight account is being managed by the Symbee Connect Administration Portal, so is volatile. Any time you deploy new reports or updates to existing predefined/managed reports from the Symbee Connect Administration Portal, the contents of the scbi-managed Shared Folder will be overwritten. So do not use this Shared Folder as a location to keep your custom Analysis's and Dashboard's.
The Symbee Connect managed reports are deployed into Amazon QuickSight as Dashboards.
A custom report (dashboard) can either be created from scratch by creating your own new Analysis, or you can open one of the existing predefined Dashboards deployed, and then from the Dashboard, "Save As" an Analysis. The resulting new Analysis created will be based off the chosen Dashboard, and will have all the Calculated Fields from the source Dashboard and underlying DataSet available for use in your new custom Analysis.
Modifying a Predefined Report and Republishing as a new Dashboard
If a dashboard you need is close or requires similar information as one of the standard/predefined dashboards, use this approach to create the new Dashboard you need. Some common examples or use-cases would be when you want to do things like the following:
- Hide or add columns to existing tables
- Re-order columns on existing tables
- Add additional visualizations of the data to the dashboard (for example, graphs, charts, gauges, logo's or graphics, additional text)
- Add new metrics based on other data already present in the DataSet
- Add fixed filters to the data returned on the Dashboard to limit the scope (for example to a specific Department or set of Queues)
General Approach
The steps below outline the general approach for this type of use case - refer to the official Amazon QuickSight User Guide for further details.
-
Within QuickSight, select and bring up one of the existing predefined/managed report Dashboards deployed via the Symbee Connect Administration Portal.
-
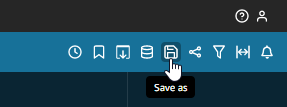
At the top right of the Dashboard, click Save as to save the Dashboard back to a new Analysis
-
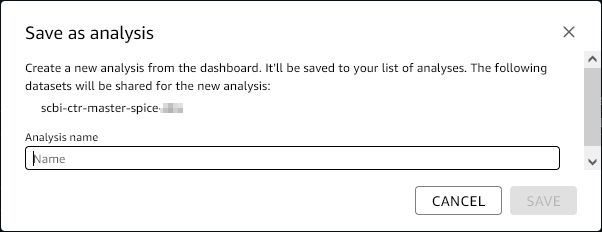
In the resulting dialog, enter a name for your new Analysis and Save. This creates a new editable Analysis that can be updated, changed or added to as needed.
-
Make updates to your new customized Analysis as needed.
-
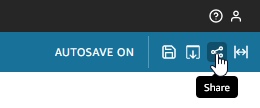
When ready, within the new Analysis, publish your customized Analysis as a new Dashboard by clicking the Share icon in the top-right...
-
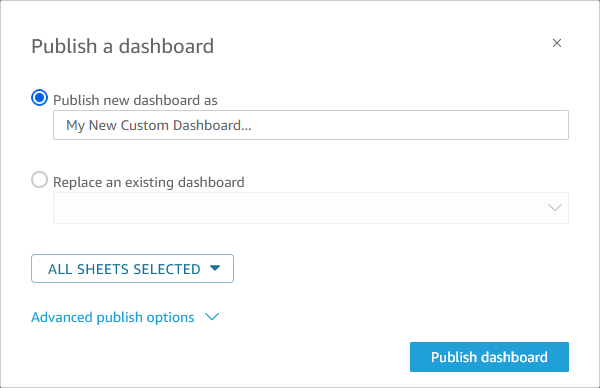
In the resulting Publish a dashboard dialog, enter a name for your new Dashboard (often, the same name as the Analysis is used), configure any advanced options as needed, and complete by clicking Publish Dashboard.
-
With your new customized Analysis published as a Dashboard, then Share the new dashboard to other users as needed.
Sharing the new Dashboard
Note: There are multiple approaches available in QuickSight for sharing Dashboards (and other resources) to target users. You can individually choose to share a Dashboard with a named target User or user(s), you can share the Dashboard to a pre-configured (or new) User Group, or you could add the Dashboard to a Shared Folder, and then set the ownership / visibility of the Shared Folder and all its contents to a selected User or User Group.
If these concepts are new to you, review our brief QuickSight Terminology section for some context.
Beyond that, refer to the official Amazon QuickSight User Guide documentation for further details.
Enhancing a Predefined report with your custom Contact Attributes
Another common use-case is to create a custom report/dashboard, starting from one of the predefined dashboards, and then augment that data using custom Contact Attribute names and values being used and collected in your Amazon Connect Contact Flows.
The approach described in this section, for accessing and using your custom Contact Attributes is specifically recommended as the preferred approach as it allows you to "extend" the Symbee Connect Business Intelligence (SCBI) predefined/managed DataSets rather than making a "point in time" copy of the DataSet. This approach means any future release updates or additions to the dataset being extended (or its backend Athena view or Glue database) will inherently be in your child dataset that extends from the standard dataset, as essentially your child dataset inherits the behavior from its parent.
The concept of creating a child dataset from a parent dataset is described in the Amazon QuickSight User Guide documentation, under Creating a dataset using an existing dataset.
Due to a current Amazon QuickSight limitation, the approach below can only be used with non-SPICE Datasets
There is currently a limitation in Amazon QuickSight that blocks you from using the approach below (extending a Dataset, and JSON parsing out the values of your custom Contact Attributes as new Dataset Calculated Fields) with a SPICE based Dataset. Therefore, when extended/creating a new child dataset, always begin with one of the SCBI non-SPICE datasets.
General Approach
The steps below outline the general approach for this type of use case - refer to the official Amazon QuickSight User Guide for further details.
Step 1 - Create a new child dataset from the predefined/managed dataset
-
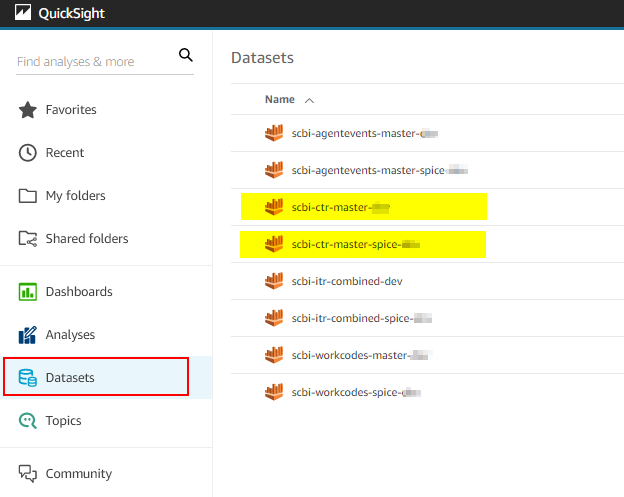
Within QuickSight, navigate to Datasets from your home screen, and click into the two scbi-ctr-master predefined/managed Contact Trace Record (CTR) based dataset that was deployed from the Symbee Connect Administration Portal.
-
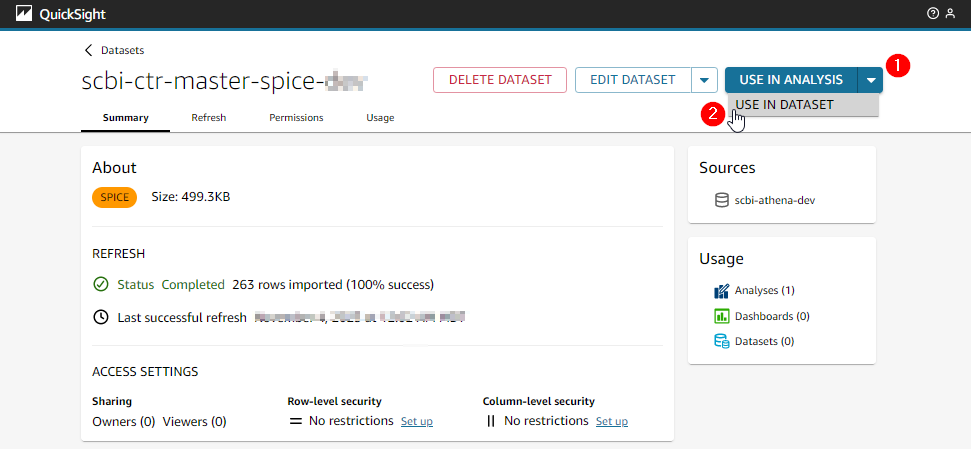
From the resulting Dataset details screen, at the top right, click the dropdown beside USE IN ANALYSIS, and then select USE IN DATASET (this begins the creation of a new child dataset that inherits off the existing dataset)
-
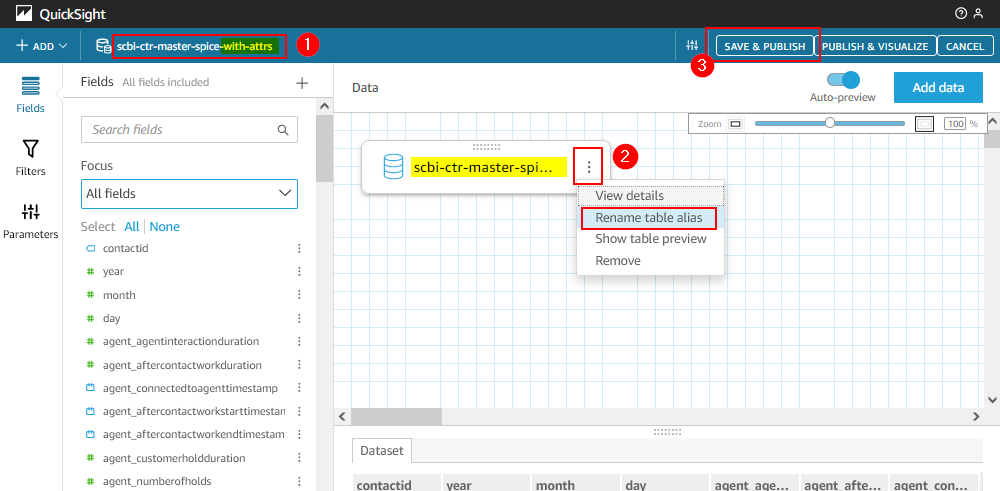
In the resulting dataset screen, update the name of the new dataset - see (1) in the screen-shot below - to something appropriate that's easily identifiable to you and others later as to what the new dataset is. The suggestion here is to keep the existing dataset name but add "-with-attrs" on the end (to represent "with attributes") . In addition to updating the dataset name in the top left, also update the table alias name - see (2) in the screen-shot below - to the same name you give to your dataset in (1). Finally, click SAVE & PUBLISH (3) in the top right.
-
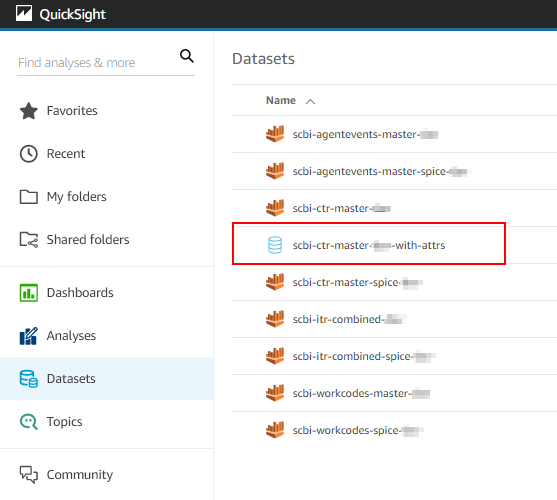
After the above save and publish, return to the Datasets list from your home screen to confirm your new dataset creation, and that its depicted in blue, as a child dataset. It should look something like below:
Step 2 - Add additional Calculated Fields to your new child dataset for each Contact Attribute you want to use
- Click back into your new child dataset to being editing.
-
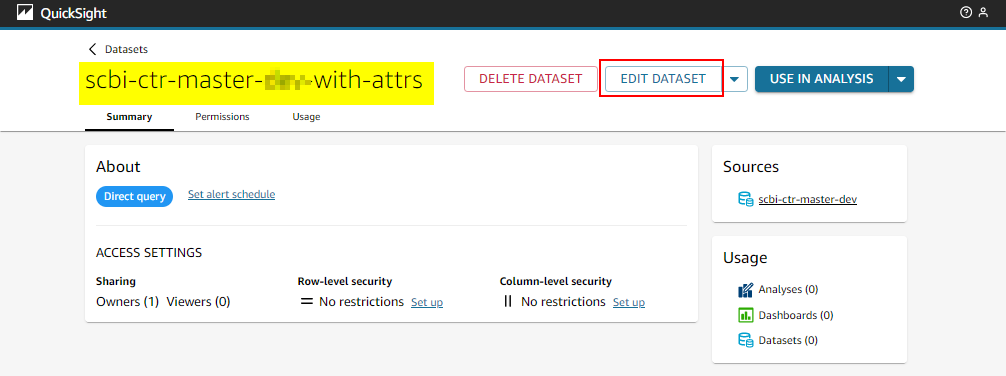
In the top-right of the Dataset details screen, click EDIT DATASET.
-
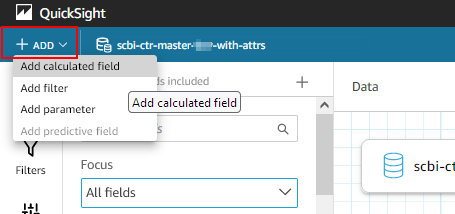
In the resulting dataset maintain view, in the top left, click the + Add drop down, and select Add calculated field. Essentially here, you will be adding a set of new calculated fields to the dataset for each Contact Attribute you want to expose for either filtering, to view, or to use in some other way in an Analysis / Dashboard.
-
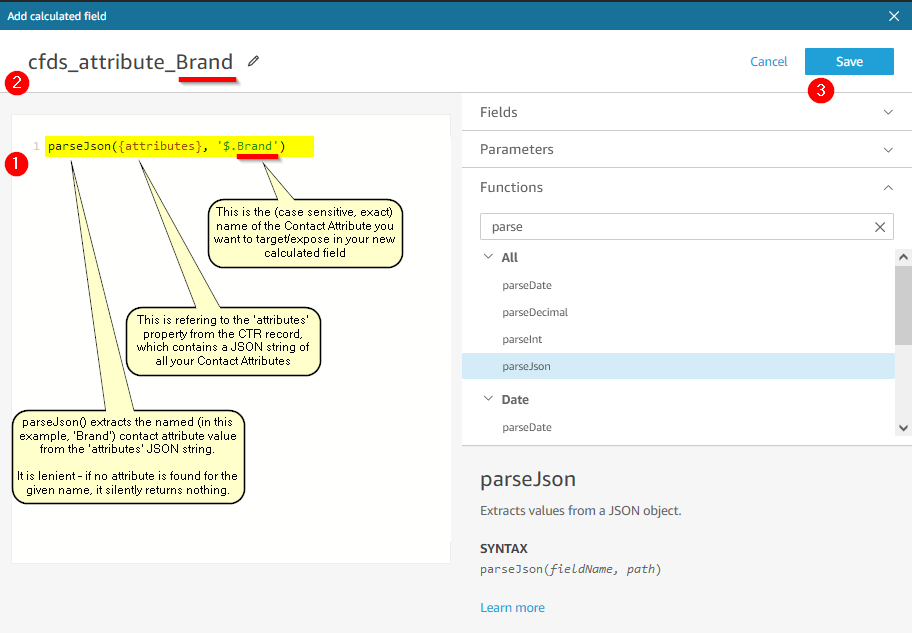
In the resulting Add calculated field screen, use the parseJson() function to pull out the value of a Contact Attribute you want to target and expose in your dataset - see (1) in the screen-shot below. Give your new calculated field an appropriate name (2). By convention we suggest using: "cfds_attribute_attribute-name" - where cfds represents "calculated field at the dataset level", and attribute indicates the value is sourced from the attributes column. Click Save (3) to complete adding the new calculated field. The screen-shot below shows an example of adding a new calculated field for a Contact Attribute that was named "Brand"...
-
Repeat step 4 above for each Contact Attribute you want to expose for use.
-
Once you have added all your Contact Attribute calculated fields, click Save & Publish on the top-right of the Dataset maintain view to save your updates.
Step 3 - Use your new Dataset in an Analysis
At this point you now have a new CTR based Dataset that extends the standard/managed dataset and adds columns for all your required Contact Attributes.
These new columns/fields can now be used in filters, controls, displayed on visuals, used as input in new calculated fields, and aggregated (if the type is appropriate to do so).
You can either start from scratch and create a new Analysis to meet your needs using this new Dataset, or you can start from one of the existing CTR-based standard/managed Dashboards.
To start from an existing standard/managed Dashboard, the general approach is as follows:
- Open an existing CTR based standard/managed Dashboard, and Save As the dashboard to a new Analysis - see the steps in the previous Modifying a Predefined Report and Republishing as a new Dashboard section for details on this.
-
Within your new Analysis, then replace the DataSet used by the visuals in the Analysis, with your new child Dataset. In general, the steps for this are:
- From within the Analysis...
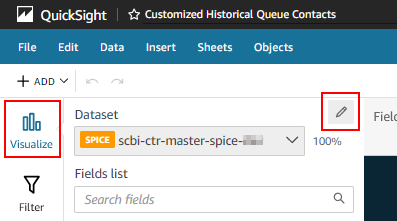
- Select the Visualize tab on the left, and click the pencil icon to the right of the Dataset selector...
-
In the resulting Datasets in this analysis dialog, click the 3 vertical dots to the right of the Dataset, and select Replace...
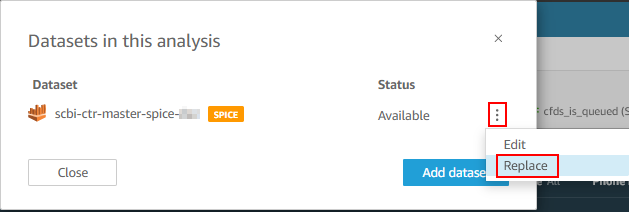
-
From the resulting Select replacement dataset dialog, select your new child dataset
- Once you return to the main analysis maintain view, your new Contact Attribute calculated fields will be available for use in your Filters, Visuals, and other calculated fields as needed.