Setting up your first WebChat
Overview
The following step by step guides you through setting up your first Webchat endpoint. The instructions differ depending on the Delivery Provider you are going to use for your webchat conversations. See Selecting the Chat Delivery Provider for further details on this.
Setting up a WebChat using Delivery Provider: Symbee Connect
Prerequisites
Configure a Symbee Connect Skill Queue
- You will need to set up a specific Skill Queue to deliver your new webchat conversations to agents with. Make sure when you add the new webchat Skill Queue, you select WebChat in the Queue Type.
- You will need to assign the new webchat Skill Queue above, to selected agents that will be receiving the webchat conversations.
Click here for our Queues and Skill Assignment section in our Administration Guide.
Configure Hours of Operation
This is an optional step, but if you would like your webchat to be operational at certain times of the day, you will need to set up an Hours of Operation schedule.
For our step by step guide for setting up Hours of Operation, click here.
Add a new Webchat Instance
- Login to the Symbee Connect Administration Portal.
- If you have more than one Environment configured within your Company in Symbee Connect, make sure you have the appropriate one selected. This can be found on the Navigation bar to the left of the Function menu.
- Click on the Function menu on the in the top navigation bar and the select WebChat located under the Channel Configuration section.
- Select WebChat Endpoints on the left side and then click Add WebChat Instance to create a new WebChat Instance.
- Add a WebChat Instance Code and WebChat Instance Name and click the Add button.
Configure the new WebChat Instance
- Click on the WebChat Instance Code you just created or wish to configure.
- Configure Integration Settings:
- Delivery Provider: Choose Symbee from the dropdown box.
- Default Queue List: Choose the Web Chat Skill Queue you created above.
- SES From Address: Optional - a verified 'From' address in your Amazon SES (Simple Email Service) used for sending transcript emails to the customer when they request a copy of the chat transcript at the end of the webchat. Leave this blank to disable transcript by email functionality.
For example:
support@yourcompany.com - SES AWS Region: The AWS Region of the Amazon SES (Simple Email Service) used for sending transcript emails. Leave this blank to disable transcript by email functionality.
- Configure Chat Client UI Customization: for more information and descriptions click here.
- Configure Canned Messages and Localization: for more information and descriptions click here.
- Configure Additional Customer Form Items: for more information and descriptions click here.
- When completed, scroll back to the top and click Save.
Test your new WebChat Instance
- After you have completed the above steps, from the WebChat Instances page, click on the URL next to the new WebChat Instance you have created.
- It will launch a new WebChat window. Complete the form and click on the Start Chat button at the bottom.
- You will see Requesting Conversation until one of your skilled users becomes available to receive the webchat conversation.
- Log in one of your users skilled for WebChat and verify they receive the chat.
Setting up a WebChat using Delivery Provider: Amazon
Prerequisites
Confirm CCP-V2 is being used
In order to receive Amazon Connect Chats (chat/SMS), you need to be running CCP v2.
- Log into the Symbee Connect Administration Portal.
- Click the on the main Function menu in the top navigation bar and then click on Amazon Connect Integration under Company Environment Configuration
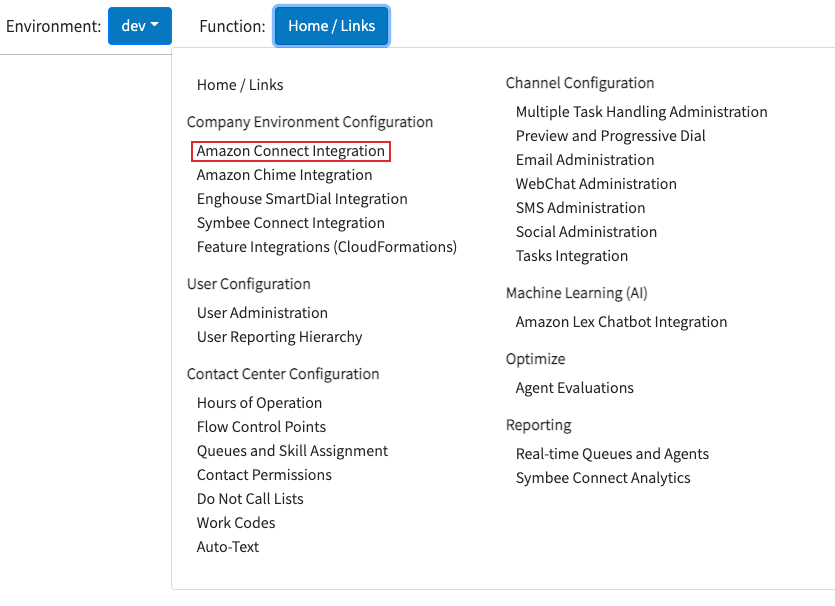
-
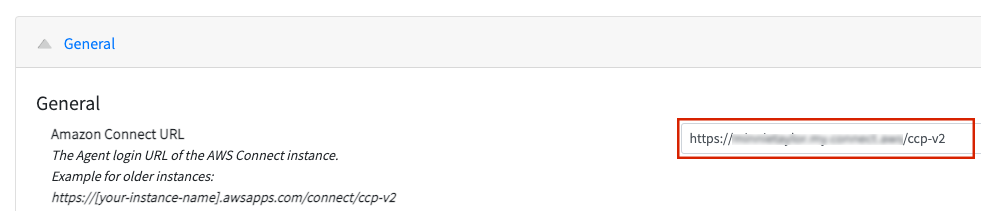
Confirm your Amazon Connect URL ends with /ccp-v2.
-
If it doesn’t, modify your URL to end with /ccp-v2 - this is required to receive Amazon Connect Chats (Chat/SMS).
Download the Amazon Connect Chat Integration CloudFormation
Note that this step only needs to be performed before setting up your first new Amazon Delivered Chat channel for a Symbee Connect Environment.
If this is the first Symbee Connect CloudFormation you have run, you will need to run the Integrations CloudFormation first. For step by step instructions and further information about CloudFormations click here.
- Log into the Symbee Connect Administration Portal.
- If you have more than one Environment configured within your Company in Symbee Connect, make sure you have the appropriate one selected. This can be found on the Navigation bar to the left of the Function menu.
- Then click on the main Function menu in the top navigation bar, and click on Feature Integrations (CloudFormations) in the Company Environment Configuration section.
- From the Feature Integrations (AWS CloudFormations) page, scroll down and locate the Amazon Connect Chat Integration CloudFormation, and click the download link to download and save the CloudFormation script.
- You will be prompted with a Save As dialog screen. Save the file locally to your PC for use in the following steps.
Run Amazon Connect Chat Integration CloudFormation in your AWS Account
- Log Into your AWS Management Console.
- Make sure you are in the correct AWS region for where you want to deploy (top right of the Navigation bar) – the same region as your Amazon Connect instance.
- Navigate to the CloudFormation console (under Management and Governance, on the Services menu).
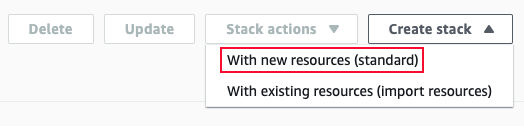
-
From the CloudFormations console, select Stacks in the left-hand navigation bar, and select Create Stack and select With new resources (standard) from the dropdown box.
-
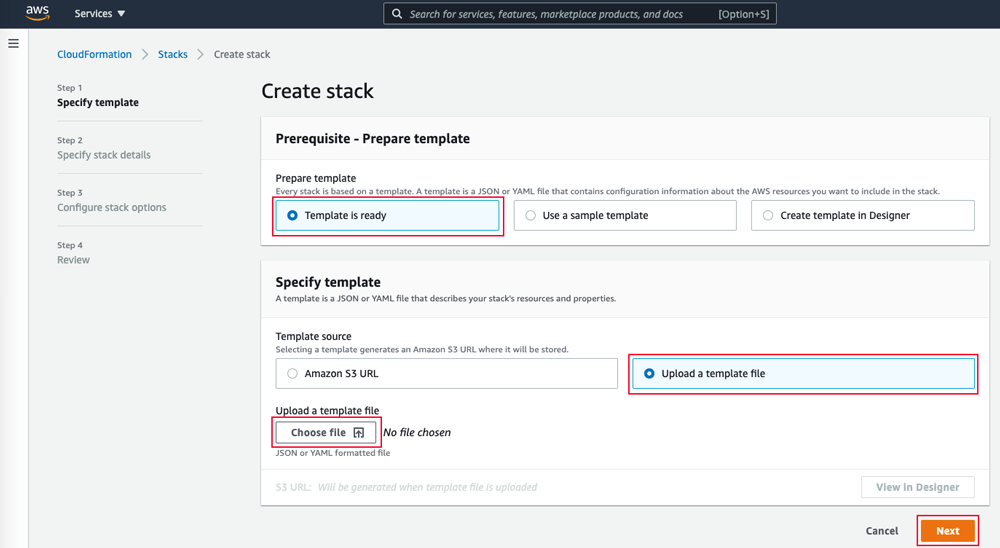
You will be presented the “Create Stack” view for creating/deploying a new CloudFormation script (known as a stack):
-
Under the Prepare Template section, select Template is Ready
-
Under Specify Template, select Upload a template file
-
Under Upload a template file, click Choose File
-
In the resulting file selector, find and upload the file you saved from above.
-
Click Next at the bottom
- In the Specify Stack Details screen, complete the fields as follows:
- Stack Name: Enter a name appropriately. We suggest using your Symbee Connect Environment (e.g. dev, prod, etc.) in the name for better organization, in case you have CloudFormations for multiple Symbee Connect Environments Connect being deployed into the same AWS Account.
For example:
companyalias-environment-amazonchat - Click Next
- On the next Configure stack options screen, accept all the defaults, and click Next.
- On the next Review testing screen, scroll to the bottom Capabilities section, check the “I acknowledge that AWS CloudFormation might create IAM resources with custom names.” Checkbox, and finally click Create Stack.
Build Amazon Connect Chat Queue and Contact Flow
You will need to setup an Amazon Connect Contact Flow to receive and handle your chat and respective Chat Queue in Amazon Connect and assign it to a Routing Profile, if you are routing your webchat to an agent.
Configure your new WebChat
Once the above is complete, follow the same steps outlined above for the first Symbee Delivered Webchat, starting here, except select the Delivery Provider to be Amazon, and select your Contact Flow created above.