Post-CloudFormation Amazon QuickSight Configuration Steps
Following the one-time steps in this step-by-step guide once you have completed downloading and running the Business Intelligence CloudFormation for the first time.
Refer back to the overall Installation and Setup guide here for context.
After your Symbee Connect Business Intelligence (SCBI) CloudFormation stack deployment is complete, follow the steps below to configure your Amazon QuickSight environment to access the new Athena/Glue database created by the Symbee Connect Business Intelligence CloudFormation and to grant yourself access to the Amazon QuickSight User Groups that share permissions to the managed/pre-defined reports (Dashboards and Datasets).
Step 1 - Add Users to the Business Intelligence "Managed" User Groups
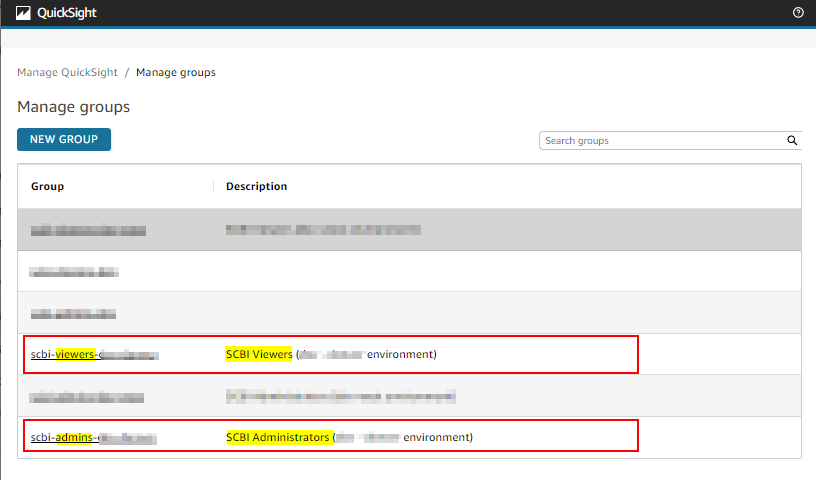
First - Business Intelligence provisions two new User Groups in Amazon QuickSight - these user groups have the ownership of all the managed assets (Dashboards, Datasets, and Data Source) that get deployed into your Amazon QuickSight environment from the Symbee Connect Administration Portal. User's need to be added to one of these groups before they will be able to "see" the new assets.
The two new User Groups will be named as follows:
- scbi-admins-... (User added to this group have full read-write access to the managed assets deployed)
- scbi-viewers-... (User added to this group have read-only access to the managed assets deployed)
Follow the steps below to add add yourself (and any other users needed) to one of the above new Amazon QuickSight User Groups:
-
Log into the Amazon QuickSight Console as an administrator
-
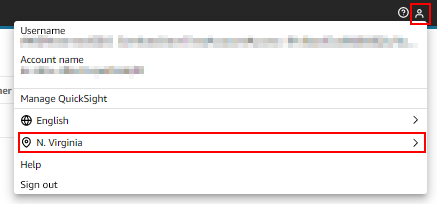
If your Amazon QuickSight environment is multi-region, make sure you are in your Home region (refer here for details)
-
In the very top-right click the small user icon. From the drop down menu, click Manage QuickSight
-
In the left-hand navigation bar, select Manage Groups...
-
In the resulting Manage groups view, locate the scbi-admins User Group and click into it...
-
In the User Group view, (1) click Add User (top right), then (2) search for your user by user-id or user name in the search box, and then (3) click Add beside the user in the search results to add them to the User Group.
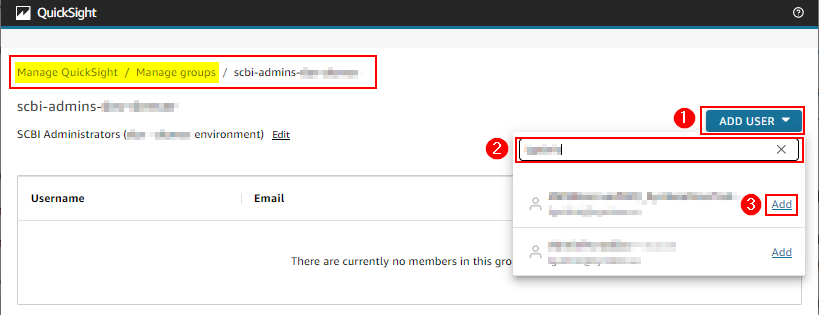
Note: Based on experience, after adding yourself (or another user) to a new User Group, it can take a couple of minutes for the permissions to propagate in Amazon QuickSight. Be patient. Also try logging out and logging back in to Amazon QuickSight.
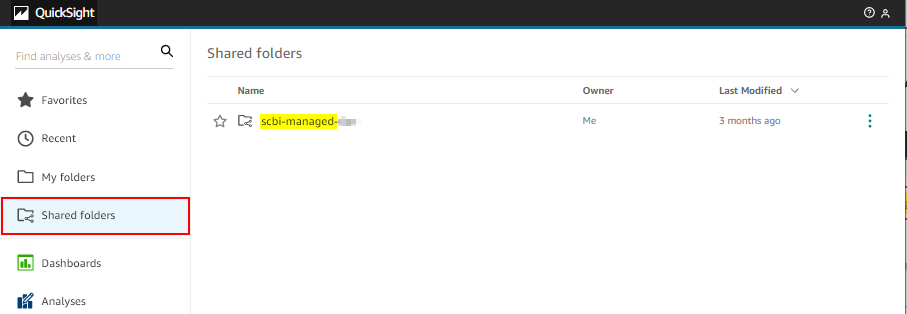
Once your permissions have taken effect, if everything is correct, from the Amazon QuickSight Console home screen, under Shared folders you should now have visibility to the Business Intelligence managed Shared Folder where all assets will be deployed. The folder will be named scbi-managed... and should look something like this:
Step 2 - Grant Amazon QuickSight Permissions to the new Business Intelligence S3 Buckets
Next, follow the steps below to allow Amazon QuickSight to access the newly created S3 Buckets:
-
If not already in the Amazon QuickSight Console, log back in as an administrator
-
If your Amazon QuickSight environment is multi-region, make sure you are in your Home region (refer here for details)
-
In the very top-right click the small user icon. From the drop down menu, click Manage QuickSight
-
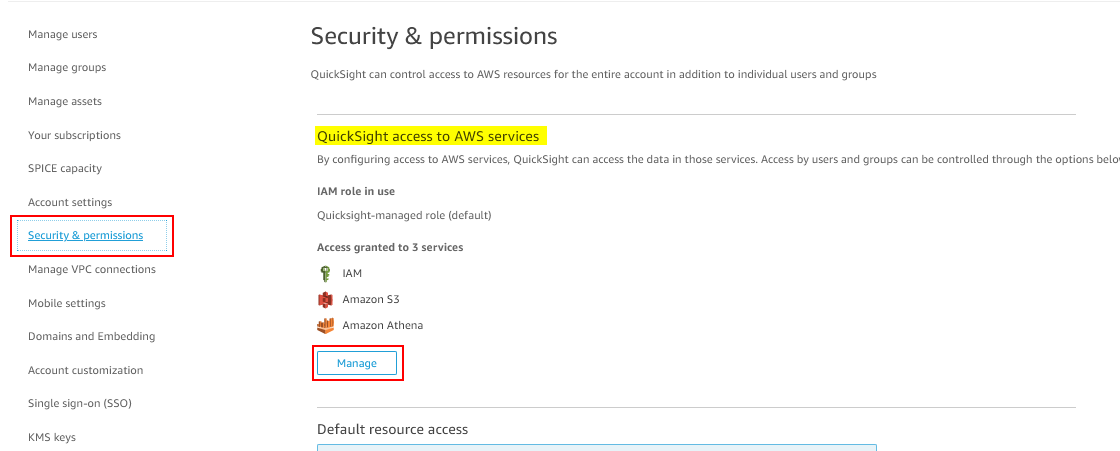
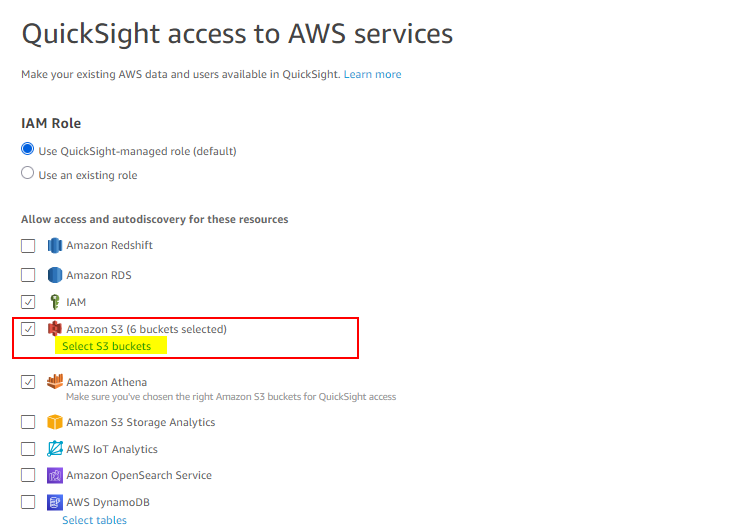
In the left-hand navigation bar, select Security & permissions, and then under QuickSight access to AWS Services, click the Manage button...
-
On the resulting QuickSight access to AWS services page, click the little Select S3 buckets link under Amazon S3...
-
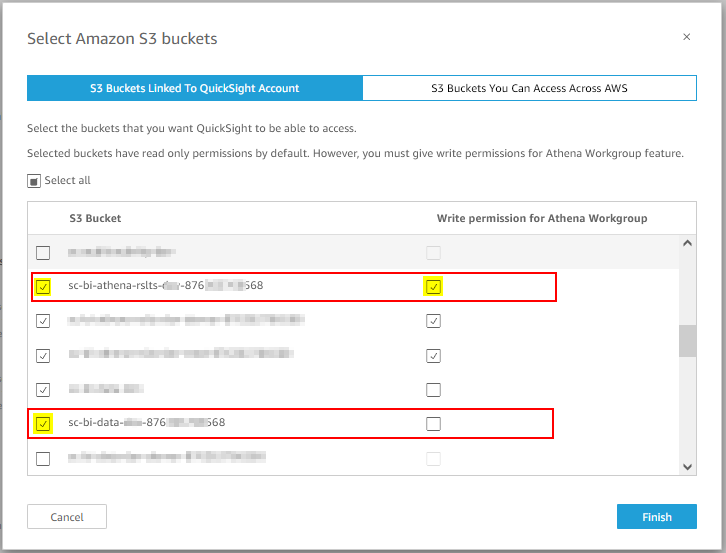
In the Select Amazon S3 buckets dialog, locate the two new S3 buckets created by your Business Intelligence CloudFormation stack, and grant Amazon QuickSight access to those S3 buckets. For reference, the two S3 Buckets will be named:
- sc-bi-data-environment-AWS account number (QuickSight only requires READ access to this bucket)
- sc-bi-athena-rslts-environment-AWS account number (QuickSight requires both READ and WRITE access to this)
-
Click Finish and Save your Amazon QuickSight permissions updates
Step 3 - Verify Amazon QuickSight access to the new Athena Data Source
Follow the steps below to ensure Amazon QuickSight can access your Athena Data Source (essentially the connection between QuickSight and your Athena/Glue database):
-
If not already in the Amazon QuickSight Console, log back in as an administrator
-
If your Amazon QuickSight environment is multi-region, in the very top-right click the small user icon. From the drop down menu, make sure you are in the region where you deployed your Business Intelligence CloudFormation stack using the region selector...
-
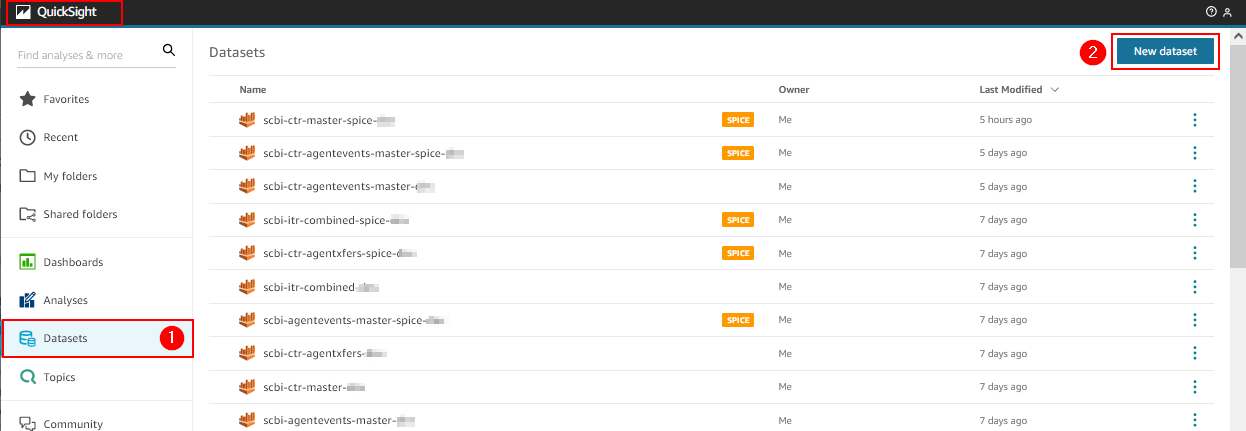
From the main Amazon QuickSight Console home view, click on Datasets on the left, and click New Dataset on the top right (Note: you are not going to really create a new Dataset, but the below is the only way to get access to your Data Source)...
-
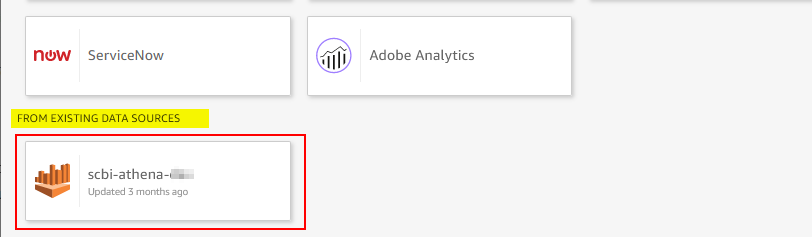
From the Datasets view, scroll down to the bottom, and under the FROM EXISTING DATA SOURCES section, find the new Data Source created for Business Intelligence (it will be named scbi-athena...) and click it...
-
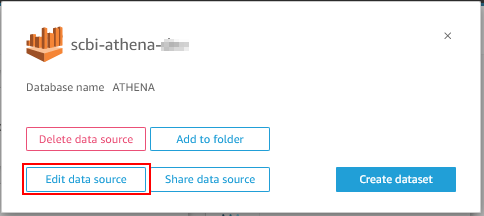
On the resulting Data Source dialog, click Edit data source...
-
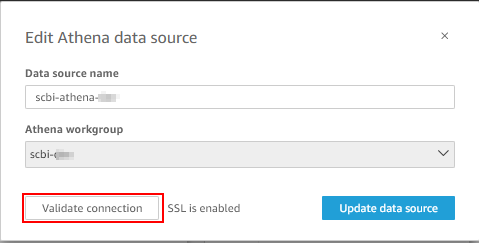
On the resulting Edit Athena data source dialog, click Validate connection....
-
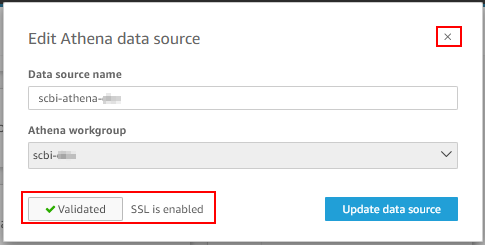
Ensure the connection successfully validates. It should look like this...
-
Then cancel out of the flow using the 'X' in the top right of the above dialog, and return to the home screen by clicking the Amazon QuickSight logo in the top left of the screen.