Auto-Refreshing Real-time QuickSight Dashboards
Symbee Connect Business Intelligence (SCBI) offers a complete set of predefined out-the-box Contact Center focused reports - known as Amazon QuickSight Dashboards.
The predefined dashboards are categorized as either Historical, Current Day, or Real-time by their name. Historical dashboards visualize data from "yesterday" back into the past, and therefore report on data that is no longer continually being updated. In contrast, Current Day dashboards are intended for visualizing the current day's data, which is continually being updated throughout the day. And Real-time dashboards visualize data as of "right now". (For more details on this, refer to: Historical versus Current Day naming convention in the Reference section).
Often when viewing a Current Day or Real-time dashboard, the preference would be to have that dashboard automatically be refreshed every few minutes to reflect the latest results over the continually updating data.
One limitation of Amazon QuickSight is it does not provide a native way through the Amazon QuickSight console to auto-refresh a dashboard (report) automatically on a predefined interval (for example, update every minute).
To address this, an embedded real-time dashboard tool is provided within the Symbee Connect Administration Portal to allow you to view any of your Amazon QuickSight dashboards with an optional automated refresh timer suited for displaying real-time views if needed.
Follow the steps below to allow embedded display of your Amazon QuickSight Dashboards in your Symbee Connect Administration Portal which allows you to set the Dashboards on a timed-refresh.
Step 1 - Create a User in Amazon QuickSight for the Symbee Connect Admin Portal to use for Dashboard Embedding
This first step creates a common user in your Amazon QuickSight instance that will be used by your Symbee Connect Administration Portal. When you create the user, you will need to back it with a real email address to receive the invite. As an administrator you can re-use your own email address for this one-time step - once you receive and accept the invite to your email address from Amazon QuickSight, the user being created never needs to log in again.
-
Log into the Amazon QuickSight Console as an administrator
-
If your Amazon QuickSight environment is multi-region, make sure you are in your Home region (refer here for details)
-
In the very top-right click the small user icon. From the drop down menu, click Manage QuickSight
-
In the left-hand navigation bar, select Manage users...
-
On the Manage users view, click Invite users at the top.
-
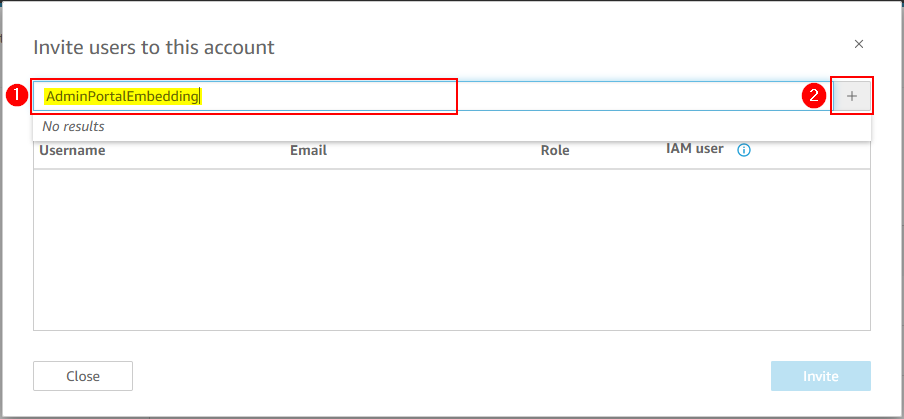
On the resulting Invite users to this account dialog, (1) enter a name for the common user to be used by the Admin Portal for embedding, and (2) click the '+' button to the right. See example below...
-
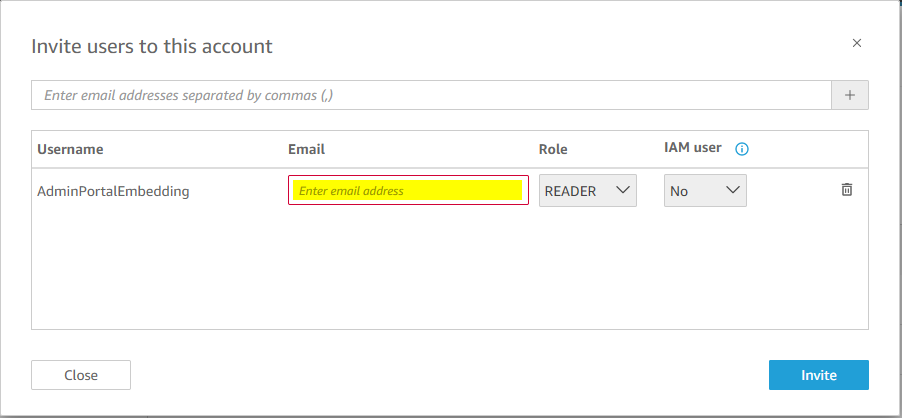
Then for the invite, enter an email address to receive the invite for the common user, select a Role of Reader, and set IAM User to No. Click the Invite button in the bottom right...
-
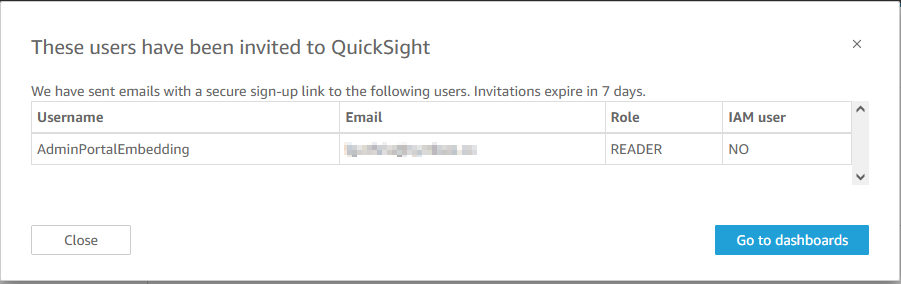
You will receive acknowledgment the invite for the new user has been sent:
-
Once you receive the invite email, accept it, set a password for the account and sign in.
Step 2 - Add the new User (created above) to the scbi-viewers User Group
- Log back into Amazon QuickSight Console as an administrator
- If your Amazon QuickSight environment is multi-region, make sure you are in your Home region (refer here for details)
- In the very top-right click the small user icon. From the drop down menu, click Manage QuickSight
- In the left-hand navigation bar, select Manage groups...
- Click into the User Group named scbi-viewers-...
- Click Add User on the top right, enter the name of the User you created in the previous steps, and click Add to add the new common Admin Portal embedding user to your scbi-viewers-... group.
You now have a "reader" common user the Symbee Connect Administration Portal can use to embed dashboards.
Step 3 - Add the Symbee Connect Admin Portal as an Allowed Domain for Embedding in Amazon QuickSight
- While still logged into the Amazon QuickSight Console as an administrator...
- From within Manage QuickSight, on the left-hand navigation bar, select Domains and Embedding
- On the Manage domains for embedded dashboards view, add the https:// domain of your Symbee Connect Administration Portal to the list of allowed embedding domains.
Step 4 - Configure the Embedding Amazon QuickSight user in your Admin Portal
-
Log into your *Symbee Connect Administration Portal as an administrator
-
If you have more than one Environment configured within your Company in Symbee Connect, on the top Navigation bar, ensure you select the appropriate Environment you wish to configure for Business Intelligence dashboard embedding
-
Then click on the main Function Menu in the top navigation bar, and click on Symbee Connect Integration in the Company Environment Configuration section of the displayed menu
-
On the resulting Symbee Connect Integration view, expand the Business Intelligence section, and update the settings as follows:

- Set the Default Embedding QuickSight User to the name of the user you set up in Amazon QuickSight in the previous steps
- Set the Default Embedding QuickSight User namespace to: default
-
Click Save in the top right to save your updates.
Test viewing one of your Amazon QuickSight Dashboards
While still in your Symbee Connect Administration Portal, from the main Function Menu, select QuickSight Real-time Dashboards within the Reporting section of the menu (lower right) of the displayed menu.
In the resulting Quick-Sight Real-time Dashboards view, in the selector you should see a list of all the Dashboards available in your Amazon QuickSight account. Select one of your dashboards. The Dashboard should open, and you will have a set of controls on the top-right that allow you to optionally set a refresh rate, or "pop-out" the dashboard to run in full-screen or Wallboard mode.
