Setting up your first Amazon Pinpoint SMS
Overview
This guide walks you through how to set up of the Symbee Connect SMS channel using the Amazon Pinpoint AWS service in your AWS Account for message delivery. For additional information see SMS Administration.
All general functionality for SMS management, queuing and handling resides in the Symbee Connect SaaS cloud, however for security reasons the actual usage of the Amazon Pinpoint service remains in your own AWS account. An AWS CloudFormation is provided to establish the configuration needed in your AWS account for integration of Amazon Pinpoint with the Symbee Connect SaaS solution.
Prerequisites
Confirm CCP-V2 is being used
In order to receive Amazon Connect Chats (chat/SMS), you need to be running CCP v2.
- Log into the Symbee Connect Administration Portal.
- Click the on the main Function menu in the top navigation bar and then click on Amazon Connect Integration under Company Environment Configuration
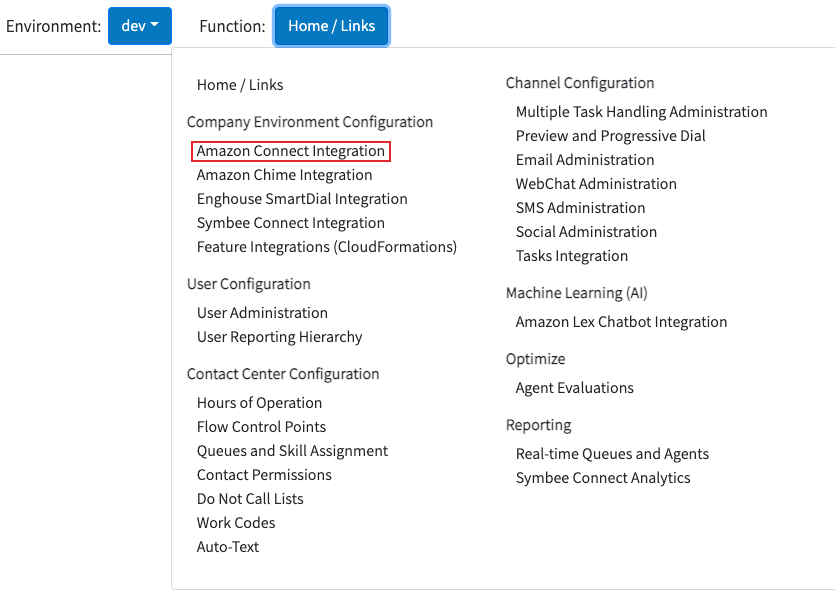
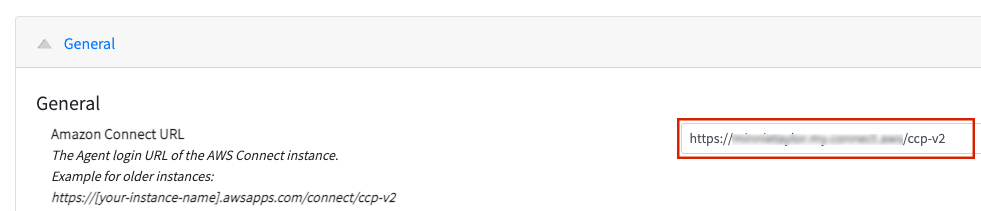
- Confirm your Amazon Connect URL ends with /ccp-v2.
- If it doesn’t, modify your URL to end with /ccp-v2 - this is required to receive Amazon Connect Chats (Chat/SMS).
Run CloudFormation
Download Amazon Pinpoint SMS CloudFormation
If this is the first Symbee Connect CloudFormation you have run, you will need to run the Integrations CloudFormation first. For step by step instructions and further information about CloudFormations click here.
- Log into the Symbee Connect Administration Portal.
- If you have more than one Environment configured within your Company in Symbee Connect, make sure you have the appropriate one selected. This can be found on the Navigation bar to the left of the Function menu.
- Then click on the main Function menu in the top navigation bar, and click on Feature Integrations (CloudFormations) in the Company Environment Configuration section.
- From the Feature Integrations (AWS CloudFormations) page, scroll down and locate the Amazon Pinpoint SMS CloudFormation, and click the download link to download and save the CloudFormation script.
- You will be prompted with a Save As dialog screen. Save the file locally to your PC for use in the following steps.
Run Symbee Connect Amazon Pinpoint SMS CloudFormation
-
Log Into your AWS Management Console.
-
Make sure you are in the correct AWS region for where you want to deploy (top right of the Navigation bar) – the same region as your Amazon Connect instance.
-
Navigate to the CloudFormation console (under Management and Governance, on the Services menu).
-
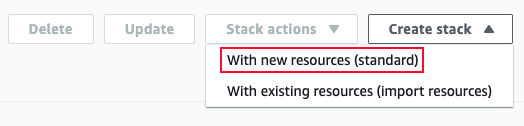
From the CloudFormations console, select Stacks in the left-hand navigation bar, and select Create Stack and select With new resources (standard) from the dropdown box.
-
You will be presented the “Create Stack” view for creating/deploying a new CloudFormation script (known as a stack):
-
Under the Prepare Template section, select Template is Ready
-
Under Specify Template, select Upload a template file
-
Under Upload a template file, click Choose File
-
In the resulting file selector, find and upload the file you saved from above.
-
Click Next at the bottom

-
In the Specify Stack Details screen, complete the fields as follows:
-
Stack Name: Enter a name appropriately. We suggest using your Symbee Connect Environment (e.g. dev, prod, etc.) in the name for better organization, in case you have CloudFormations for multiple Symbee Connect Environments Connect being deployed into the same AWS Account.
For example:
companyalias-environment-pinpoint - LambdaDistroBucket: This is the Symbee Connect Lambdas S3 bucket where the Pinpoint Lambda will uploaded from. Select the bucket name from the drop-down that matches the AWS region you are running the CloudFormation in
- LambdaSourceFile: Select from the dropdown, there will be only 1 value to pick from
-
SecretsManagerRegion: Enter the name of the AWS region where the initial Symbee Connect Integration CloudFormation was run in (see section 2.2 above).
Examples: us-east-1, us-west-2, eu-central-1, etc.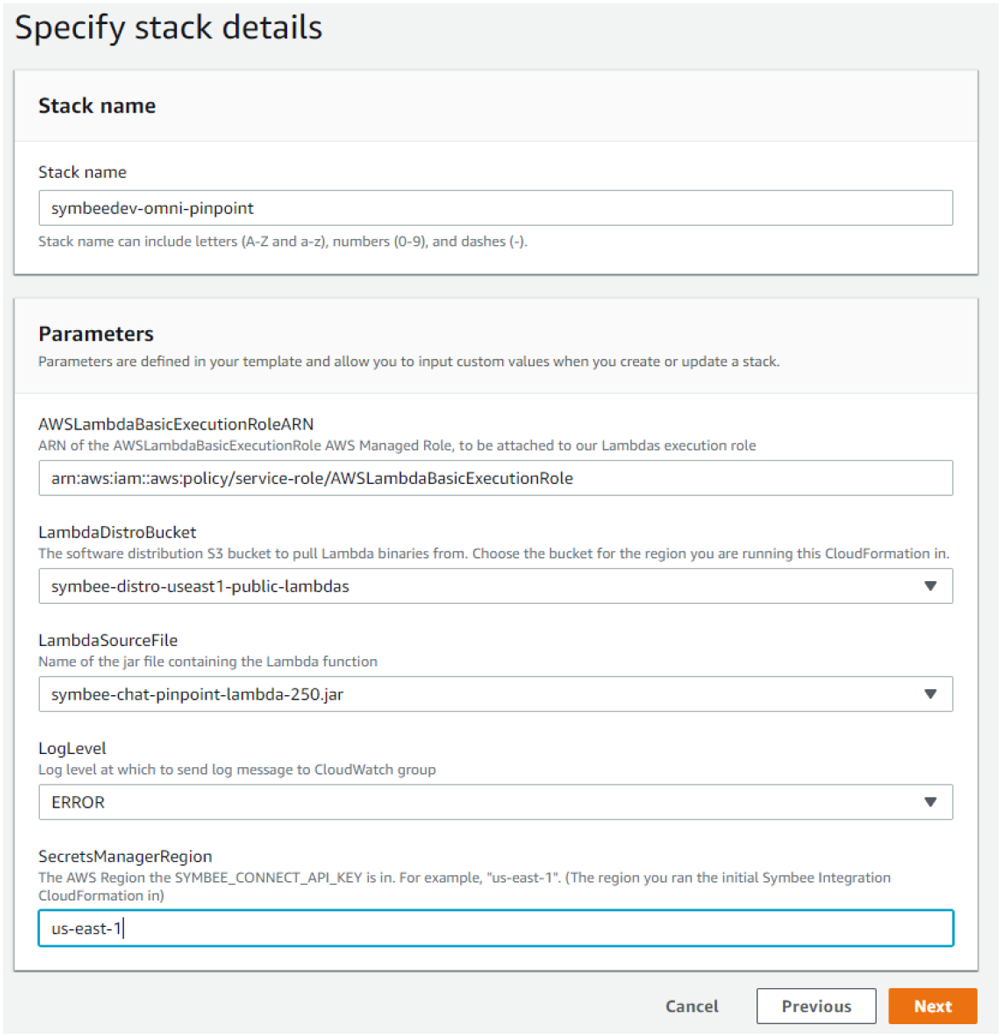
-
Click Next.
-
On the next Configure stack options screen, accept all the defaults, and click Next.
-
On the next Review testing screen, scroll to the bottom Capabilities section, check the “I acknowledge that AWS CloudFormation might create IAM resources with custom names.” Checkbox, and finally click Create Stack.
Configuring a New Project in Amazon Pinpoint
The following steps establish a new “Project” within the Amazon Pinpoint service in your AWS account, and will be used as the delivery means (sending and receiving SMS messages) for the Symbee Connect SMS channel.
-
Log Into your AWS Management Console.
-
Make sure you are in the correct AWS region for where you want to deploy (see the top right of the Navigation bar).
-
From the Services menu, navigate to the Amazon Pinpoint console (under Customer Engagement).
-
From the Amazon Pinpoint Console, select All Projects on the left, and click New Project.
-
In the Create a project dialog, enter an appropriate name for your new Pinpoint Project.
For example: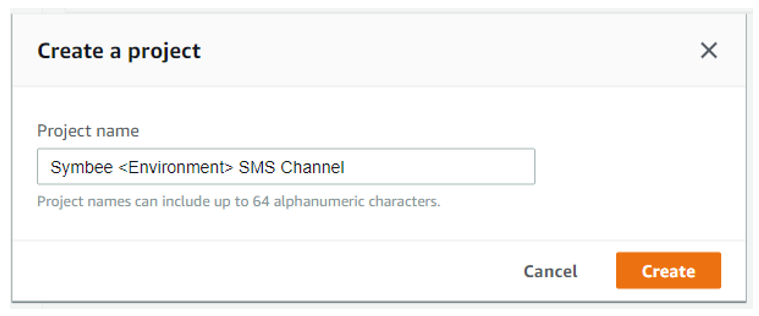
-
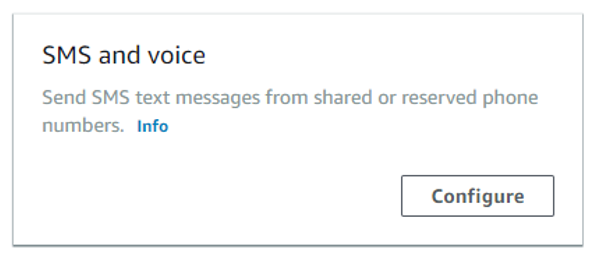
In the resulting Configure Features screen, in the SMS and Voice section, click Configure.
-
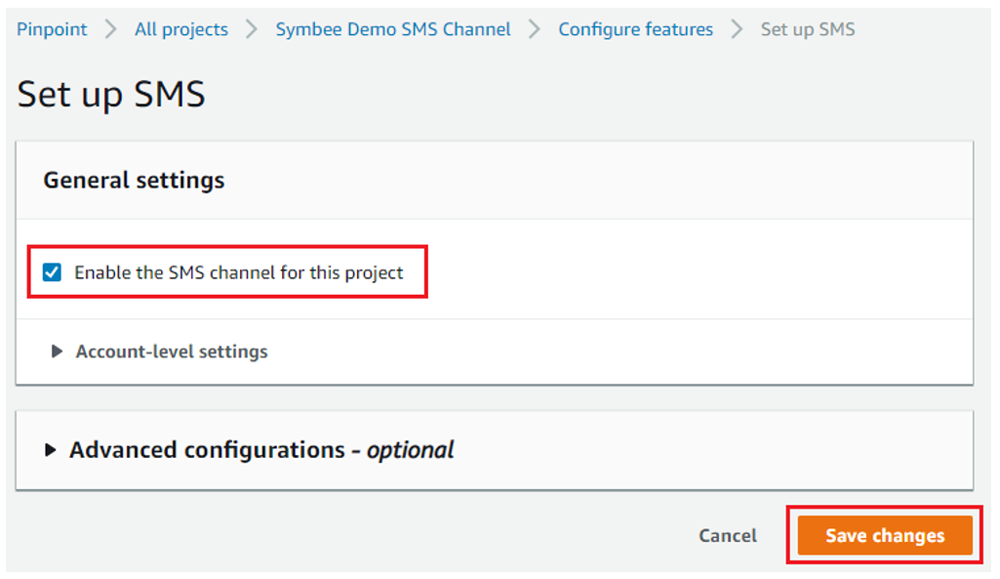
In the resulting Set up SMS screen, check the Enable the SMS channel for this project checkbox.
-
Ignore the remaining settings for now, and click Save Changes.
-
Once saved, you will be at the main Pinpoint project page, with a project navigation bar on the left.
-
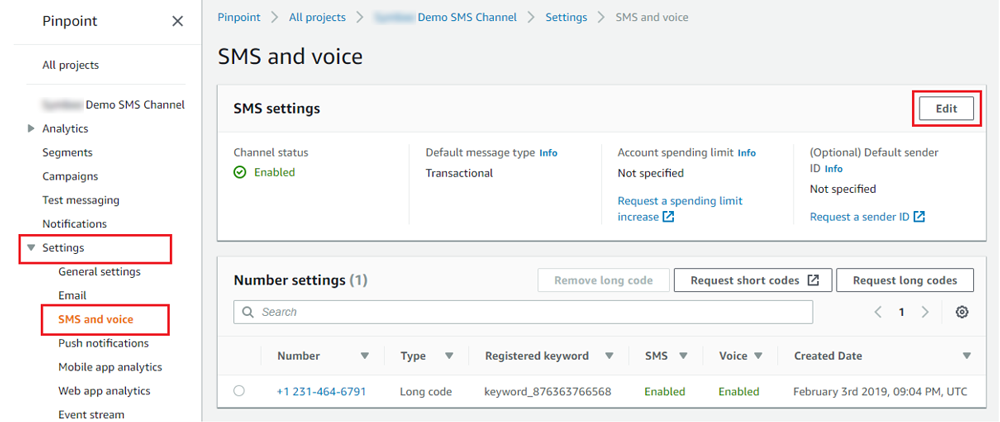
Expand Settings on the Left navigation bar, then select SMS and Voice, and Edit the SMS Settings.
-
In the resulting Edit SMS – General Settings screen:
- Expand the Account level Settings section
- Make sure the Default message type is set to: Transactional (and not Promotional)
- Save the changes
-
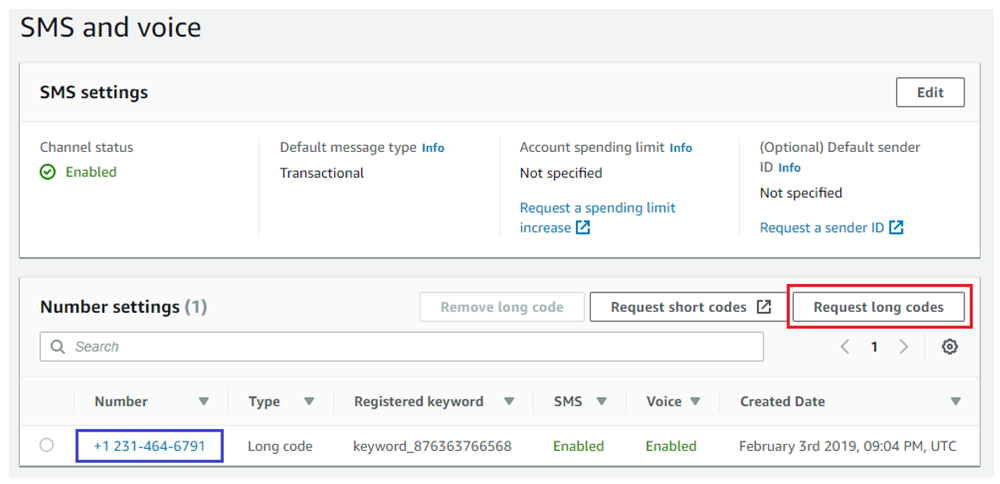
After returning to the main Pinpoint Project page, click Request Long Codes to obtain a new phone number to use for SMS messaging.
Note: If you want to port existing phone numbers, or use or obtain an SMS short code, you will need to open a ticket with Amazon AWS Support. Contact the Symbee Connect team for further assistance.
-
In the Request Long Codes screen, select the Country, ensure the Default Call Type is set to Transactional again, and click the Request Long Codes button (bottom right).
-
After returning to the main Pinpoint project page, wait until your new SMS-enabled phone number appears (it may take up to a minute or so)
-
Once your new number appears, click the number in the Number Settings list section of the main Pinpoint project page (see screen shot above, boxed in blue)
-
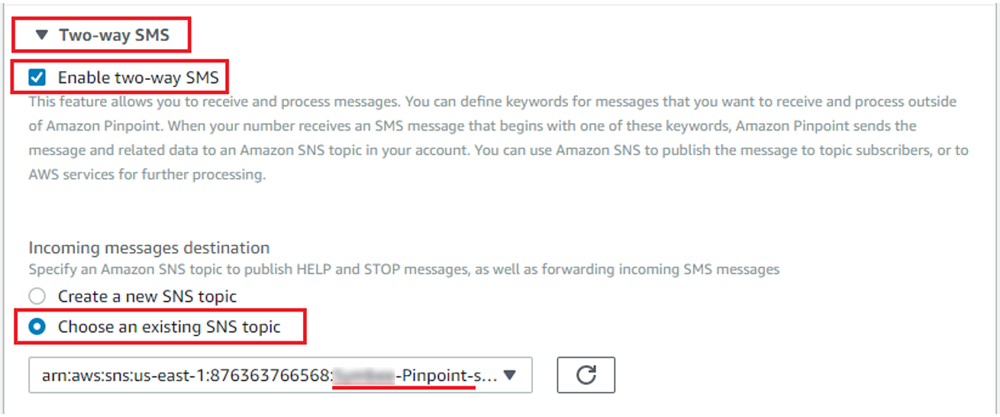
In the SMS Settings screen for your new SMS number, scroll to the bottom, expand the Two-way SMS section:
-
Ensure the Enable two-way SMS checkbox is checked
-
Under Incoming messages destination, select Choose an existing SMS topic
-
From the dropdown, select the Pinpoint… existing SNS Topic
Note: The SNS topic being selected above is created by the CloudFormation stack deployed in the earlier section 2.3. If you do not see the Pinpoint… SNS topic, make sure you have followed the steps in section 2.3 first.
-
-
Save the changes
-
Finally, return to the projects listing view of the Pinpoint console, by selecting All Projects near the top of the left navigation bar.

-
Make a copy of the unique 32 character Project ID for your new Pinpoint SMS project – this will be used in the Amazon Pinpoint SMS set up within Symbee Connect in the following section.
Configuring a new Amazon Pinpoint SMS channel within Symbee Connect
Important Note: If using Amazon as the provider, click here.
Create a new Symbee Connect Skill Queue
The following steps create a new Skill Queue within Symbee Connect that will be used to queue new incoming Pinpoint SMS conversations and have them routed to the appropriately skilled agents. This queue is then configured in the Pinpoint SMS mapping created above steps.
- Log into the Symbee Connect Administration Portal.
- If you have more than one Environment configured within your Company in Symbee Connect, make sure you have the appropriate one selected. This can be found on the Navigation bar to the left of the Function menu.
- Select Queues and Skill Assignment from the main Function menu in the top navigation bar.
- Select Skill Queues in the resulting left-hand navigation bar, and click the Add New Queue button.
- On the Add New Queue screen, enter an appropriate Skill Queue Code, Display Name and Description for your new Queue. Then make sure to select a Queue Type of SMS Pinpoint.
- Complete the remaining settings for your new Skill queue as needed and Save.
- Finally, use the Skill Assignment screen to assign your new Skill Queue to the appropriate agents that will be handling SMS conversations.
Configure an Amazon Pinpoint SMS Mapping
The following steps create a new mapping configuration between your Amazon Pinpoint project and the associated SMS Phone numbers, to your new Skill Queue configured in the previous step.
- Select SMS Administration from the main Function menu in the top navigation bar under Channel Configation.
- Then select Amazon Pinpoint in the left-hand navigation bar, and click the Add Pinpoint SMS Mapping button.
- On the resulting Add Amazon Pinpoint SMS Mapping dialog window, enter an appropriate declarative Code and Name to represent the new mapping, and click Add.
- Once added, select the new mapping from the list screen, and click Modify.
- On the Maintain Amazon Pinpoint SMS Mapping screen (see screen further shot below), complete the fields as follows:
Using Symbee Connect as the Provider
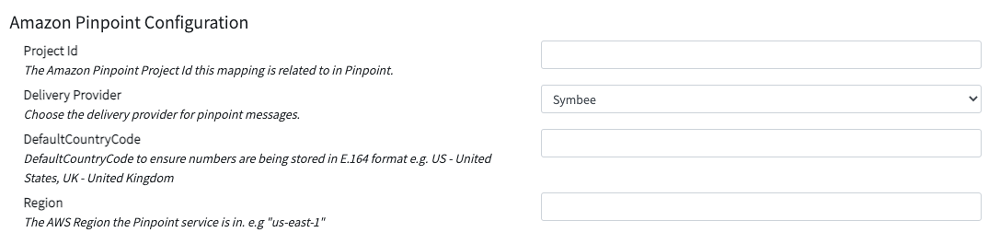
Amazon Pinpoint Configuration
-
Project Id: Enter the unique 32 character Project ID for your new Pinpoint SMS project from step 19 in Section 3
-
Delivery Provider: set to Symbee to have the messages delivered through a Symbee Connect Skill Queue.
-
Default Country Code: All phone numbers seen in SMS conversations are converted to the international E.164 phone number format (e.g. +17201232216). Enter the ISO country code to be assumed (e.g. US, GB, FR, etc.) for phone numbers seen in conversations that don’t already have an explicit identifiable country-code, used for converting to E.164 format
For a reference list of all ISO country codes, refer to the values in the “ISO CODES” column of the table posted here: https://countrycode.org/
- Region: Set to the region where you ran the Pinpoint Cloud Formation. For instance, “us-east-1”.
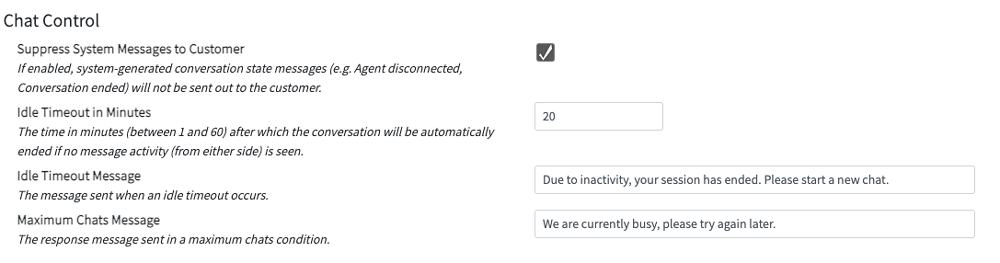
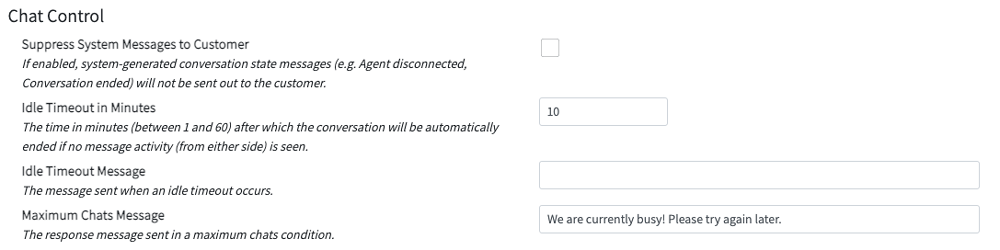
Chat Control
- Suppress System Messages to Customer: If enabled, system generated messages such as Agent Disconnected and Conversation Ended will not be sent out. This is most valuable in an SMS and Social Setup but can also be used in Chat as well.
- Idle Timeout: If no activity is seen from agent or customer, how long in minutes do you want the chat to remain active before it is automatically ended? A value between 1 and 60 is required.
- Idle Timeout Message: The message that is sent when an idle timeout occurs.
- Maximum Chats Message: The message sent to the customer if the maximum number of chats is reached.
SMS Pinpoint Number Queue Routing
- SMS Phone Number X: Enter the phone numbers you claimed within your Amazon Pinpoint project in step 13 of Section 3. Enter the phone numbers in E.164 format, including the leading “+” sign, and don’t include any braces, dashes, or spaces.
- Display Name: The friendly name displayed for this SMS Phone Number in the Agent UI.
-
Skill Queue Code X: For each respective Phone Number field, select the associated SMS Pinpoint skill queue (created in section 4.1) from the drop-down list to route new incoming SMS conversations to.

-
When complete, click Save to save your changes.
Using Amazon as the Provider
Amazon Connect Configuration
- Log Into your AWS Management Console.
- Make sure you are in the correct AWS region for where you want to deploy (top right of the Navigation bar) – the same region as your Amazon Connect instance.
- Select Contact flows from the left side navigation.
Amazon Connect Outbound Contact Flow
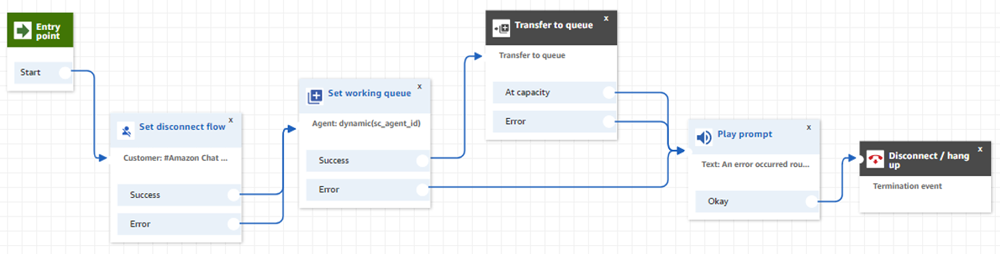
Create an Outbound contact flow for the agent to be able to send Outbound SMS conversations via a Pinpoint SMS phone number.
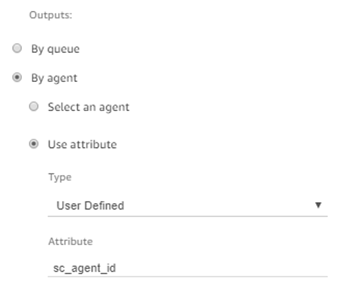
This flow basically initiates and routes an open message back to the agent, where it’s auto-answered. The SMS message is routed back to the agent using the sc_agent_id attribute set in the Set Working Queue block.
- Set Disconnect Flow: This is optional. If you are going to use a disconnect flow and have already created one, this is where you’ll set that flow to be used any time the agent ends an SMS conversation with a customer.
- Set Working Queue: This is required for an agent to be able to initiate an Outbound SMS conversation.
Symbee Connect Configuration
The remaining configuration steps are from within Symbee Connect Administration Portal, go to Function menu, SMS Administration:
Amazon Pinpoint Configuration
-
Project Id: Enter the unique 32 character Project ID for your new Pinpoint SMS project from step 19 in Section 3 TODO:
-
Delivery Provider: set to Amazon which means routing is controlled using an Amazon Connect Chat Contact flow.
-
Outbound Contact Flow: The Amazon Connect contact flow used to start unsolicited new outbound SMS conversations. See an example Outbound Contact Flow above.
-
Default Country Code: All phone numbers seen in SMS conversations are converted to the international E.164 phone number format (e.g. +17201232216). Enter the ISO country code to be assumed (e.g. US, GB, FR, etc.) for phone numbers seen in conversations that don’t already have an explicit identifiable country-code, used for converting to E.164 format.
For a reference list of all ISO country codes, refer to the values in the “ISO CODES” column of the table posted here: https://countrycode.org/
- Region: Set to the region where you ran the Pinpoint Cloud Formation. For instance, “us-east-1”.

Chat Control
- Idle Timeout: If no activity is seen from agent or customer, how long in minutes do you want the chat to remain active before it is automatically ended? Zero means to timeout.
- Idle Timeout Message: The message that is sent when an idle timeout occurs.
- Maximum Chats Message: The message sent to the customer if the maximum number of chats is reached.
SMS Pinpoint Number Queue Routing
- SMS Phone Number X: Enter the phone numbers you claimed within your Amazon Pinpoint project in step 13 of Section 3.
Note: Enter the phone numbers in E.164 format, including the leading “+” sign, and don’t include any braces, dashes, or spaces.
-
Display Name: The friendly name displayed for this SMS Phone Number in the Agent UI.
-
Contact Flow X: For each respective Phone Number field, select the associated Amazon Connect Contact flow that will provide the routing rules for any inbound SMS messages that are received on the respective SMS Pinpoint phone number.

When complete, click Save to save your changes.
Configure Agents to Initiate Outbound Messages from the Symbee Connect UI
Lastly, in order for an agent or group of agents to be able to initiate outbound SMS Pinpoint messages from within the Symbee Connect client, they must be configured to do so. In addition to configuring the agent(s) to allow this functionality, you can also set a default SMS Phone Number for their messages to be sent out from. Even with this default origin set, they will still have the ability to change it to another SMS Phone number.
-
Select User Administration from the main Function menu in the top navigation bar.
-
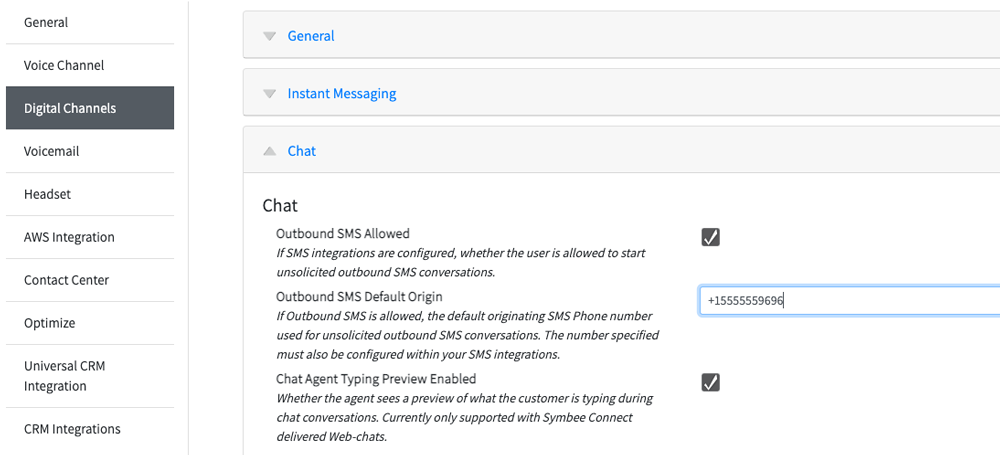
In either a group template or within an individual agents profile, select the Digital Channels option on the left hand menu. Then expand the Chat section.
-
Configure the following options:
-
Outbound SMS Allowed: Tick the checkbox to enable. This will allow the individual agent or group of agents to initiate unsolicited outbound SMS conversations.
-
Outbound SMS Default Origin: If Outbound SMS is allowed, enter in one of the configured SMS Pinpoint #’s that you have setup within your SMS Integrations. The # must be input using E.164 format.
For example: +1112223456. If no # is input, there the agent will be required to choose a # to send their conversation out of.
-
-
Scroll to the top and click Save to save the changes.